
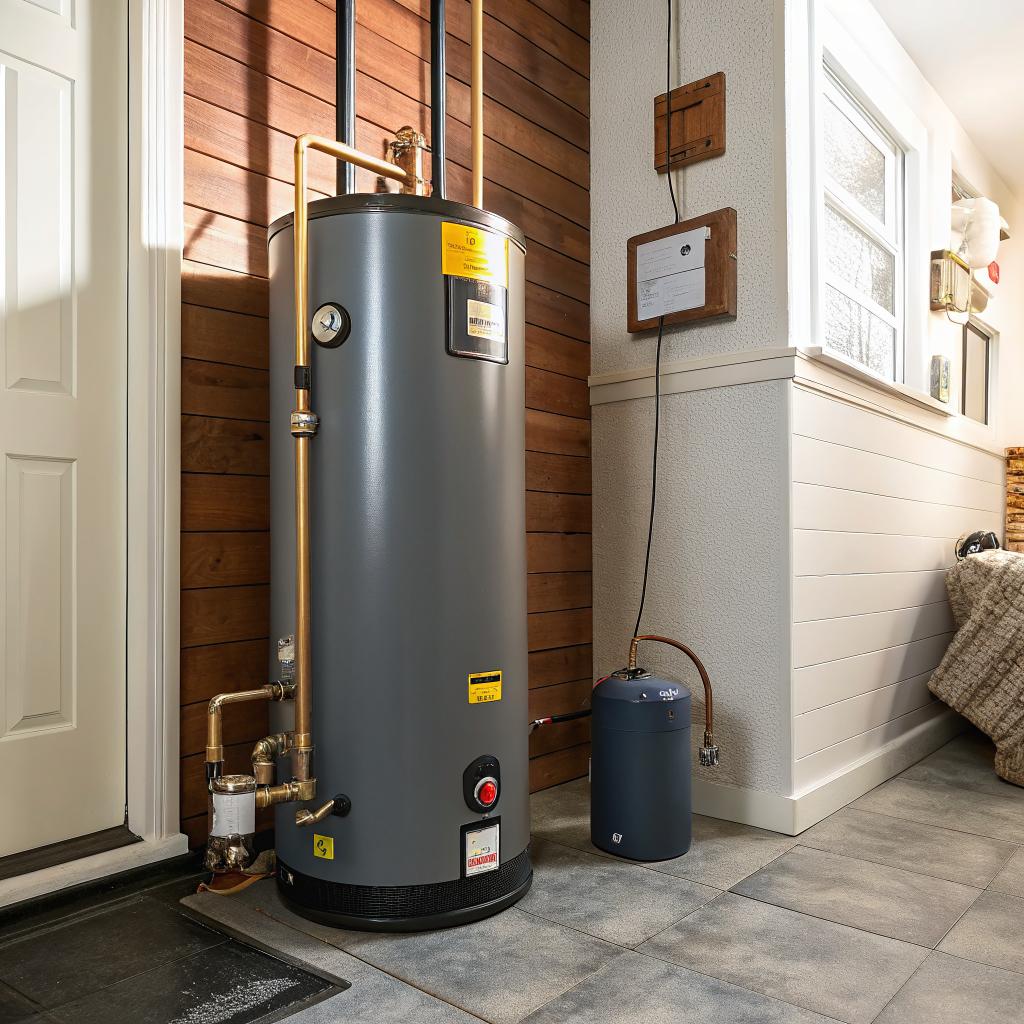
So, you are trying to fix your Aurora water heater before your next remodel and wondering what to look at first. The direct answer is this: check the age of the heater, deal with any leaks or odd noises now, and get a clear repair or replacement plan before you touch walls, floors, or finishes.
If you are planning new flooring, tile, or a full bathroom or basement update, your water heater becomes more than a metal tank in the corner. It turns into a project that can quietly ruin your new work if you ignore it. A small drip can wreck new luxury vinyl planks, a surprise replacement can force you to cut into a fresh drywall patch, and a misjudged vent or drain line can throw off your layout. So the goal here is simple: stabilize or upgrade your water heater before you invest in surfaces you actually see every day.
Treat the water heater like part of your remodel, not an afterthought behind a closet door.
Here are some things you need to know before you start tearing out tile or ordering flooring samples:
- How old your water heater is and what that really means
- Which problems need repair now and which ones are deal-breakers
- How leaks and drips affect flooring choices around the heater
- When a pre-remodel replacement actually saves money long term
- How Aurora building codes and typical basements affect water heater work
- Basic repair steps you can safely check yourself vs what to leave to a plumber
- How to coordinate heater work with your contractor or flooring installer
If you already know you need a pro and want to keep reading later, local services like aurora water heater repair can at least give you a ballpark sense of cost and timing.
How old is your water heater, really?
This is the first filter. Before you talk about flooring, paint colors, or anything, find the age.
Finding the age from the label
On the side of the tank, there is a manufacturer label with a serial number. The date is either printed directly or hidden inside that serial number.
Common pattern:
- First two numbers are the month
- Next two numbers are the year
So a serial starting with “0318…” usually means March 2018.
If the code looks different, a quick search for “brand name + water heater age serial number” usually helps. You do not need to be perfect here; you just need a rough idea.
How age connects to your remodel
Most traditional tank water heaters last about 8 to 12 years. Some make it longer, some fail early, but this range is fair.
Here is the key part for planning:
If your heater will cross the 8 to 12 year range during your new remodel’s “life,” consider replacement before you finish your new space.
Say your tank is 9 years old and you are about to install new engineered wood or luxury vinyl plank in the basement. There is a good chance that same tank will fail right on top of your new floor. Flood, panic, then cutting boards or popping planks to run new lines.
Simple age guideline
| Heater Age | Before Remodel Suggestion |
|---|---|
| 0 to 5 years | Repair if needed, keep. Plan around its location. |
| 6 to 8 years | Inspect carefully, repair small issues, start budgeting for replacement. |
| 9+ years | Serious look at replacing before new finishes, especially near living spaces. |
You do not have to follow this table like a law, but it is a good sanity check.
Common problems to fix before you remodel
Some water heater problems are small. Some are warning signs you should not ignore, especially if you care about your future floors.
1. Leaks and puddles
Look around the base of the heater.
- No water: good sign, keep checking once in a while.
- Dampness around joints or valves: repairable in many cases.
- Standing water or rust streaks from the tank itself: serious concern.
For home renovation people, the main concern is how water behaves around flooring.
Tile can usually handle small spills if grouted and sealed correctly. Luxury vinyl planks handle moisture better than hardwood, but not endless leaks. Laminate swells quickly. Solid wood can cup and stain.
If you have any leak at all and you are planning new flooring near the tank, fix the leak before you install one square foot of new material.
Often the leak comes from:
- Temperature and pressure relief (T&P) valve releasing water down the discharge pipe
- Loose drain valve at the bottom of the tank
- Loose or corroded inlet or outlet connections on top
Leaks from fittings are sometimes fixable. Leaks from the tank shell usually mean replacement.
2. Rumbling, popping, or banging sounds
If your heater rumbles or pops when it runs, that often means sediment buildup at the bottom of the tank. In Aurora, water hardness can vary, and sediment collects over time.
Why this matters before a remodel:
- It reduces heating efficiency and raises your bills.
- It can shorten the tank’s remaining life.
- It makes it harder to guess if the heater will survive your new remodel window.
A regular flush can help, at least on younger tanks. On older, already noisy tanks, a flush might not solve everything, but it is still worth talking about with a plumber before you spend money elsewhere.
3. Inconsistent hot water or running out fast
If your showers run cold halfway through, or hot water output has dropped, this touches your remodel planning more than people think.
If you are:
- Adding a bathroom
- Extending a basement into living space
- Adding a big soaking tub or multi-head shower
then your current heater might already be undersized. Fixing a small part, like a thermostat or heating element on an electric unit, can help in the short run. Still, if you are increasing demand, you might need a larger tank or a different setup.
4. Rusty water or discoloration
Turn on a hot water tap and check the color. If it looks rusty only when you run hot water, that can mean internal corrosion inside the heater or sometimes rusty pipes.
For a remodel, rusty water is not just a cosmetic issue. It can stain new tubs, tile grout, or new white sinks. Also, internal corrosion means the tank is getting close to failure.
How your water heater affects flooring choices
If you read flooring blogs, you probably hear a lot about luxury vinyl, tile, engineered wood, and underlayment. The water heater is often the silent risk behind all of that.
Think about moisture paths, not just the tank
Most people look at the heater base. Fair. But water can escape in a few ways:
- T&P valve discharge
- Condensation on pipes
- Minor splashes during maintenance or draining
- Full tank failure, which you hope never happens
If you are installing new flooring in a mechanical room, laundry area, or basement space with the heater, ask yourself:
- What happens if water gets under this floor?
- Can I reach the area later for repairs without ripping up everything?
Better flooring setups around water heaters
A few practical setups that work well:
- Water heater sitting in a metal or plastic drain pan with a pipe to a floor drain
- Tile “pad” area under and slightly around the heater, with your nicer flooring meeting it at a transition strip
- Moisture resistant vinyl in the immediate heater zone if tile is not in the budget
If the heater already sits directly on old concrete, some people are tempted to cover it all with new flooring. That can look cleaner, but it makes service later harder, and a flood can travel farther under the surface.
Simple table: flooring risks near water heaters
| Floor Type | Water Risk Near Heater | Practical Note For Remodel |
|---|---|---|
| Porcelain or ceramic tile | Low for small leaks | Good choice near heaters, especially with proper grout and waterproofing. |
| Luxury vinyl plank (LVP) | Moderate | Handles some moisture, but water can creep under planks if no pan or drain. |
| Laminate | High | Swells and warps quickly with leaks. Not ideal around heaters. |
| Engineered hardwood | High | Can cup and stain. Keep a buffer zone of tile or vinyl near the heater. |
| Carpet | Very high | Soaks leaks, grows mold. Keep carpet away from mechanical zones. |
If a contractor suggests running carpet or real wood right up to the heater, ask questions. They might be thinking about looks more than long-term risk.
Repair vs replace before a remodel
This is where many homeowners hesitate. Spend hundreds or thousands on a new heater before you even see new flooring, or try to squeeze a few more years out of the old one.
I think the honest answer depends on a mix of age, present issues, and your remodel scale.
When repair usually makes sense
You lean toward repair when:
- The heater is under 6 to 7 years old.
- Leaks are from fittings or valves, not the tank body.
- You are not adding big new hot water loads, like extra bathrooms.
- Your remodel is light, such as flooring or paint, not moving walls.
Common fixable items:
- Thermostat replacement
- Electric heating element swap
- Gas control valve replacement
- T&P valve replacement
- Supply line or shutoff valve repair
If a simple repair gives you several more years and your floors are not wrapping tightly around the heater, repair is usually fine.
When replacement is often smarter
Replacement tends to make more sense when:
- The tank is older than 8 to 10 years.
- You see rust at the base or seams of the tank.
- You keep repairing small things over and over.
- You are fully finishing a basement or high end bathroom around it.
Think about the cost of one failure. If a leaky tank forces you to remove tile, cut cabinets, or pull new flooring, the damage often costs more than a planned replacement would have.
If your remodel includes new walls, built-ins, or tricky flooring transitions around the heater, refitting the water heater first can save you from opening everything back up later.
There is no single right answer. Some people accept more risk to save money now. Others prefer a clean slate so they are not worrying about a 12 year old tank behind their new tile.
Basic checks you can safely do yourself
I am not going to walk you through full gas repairs. That is not smart without training. But there are inspection steps any homeowner can do before they talk to a pro or set a remodel date.
1. Visual inspection
Take a flashlight and look at:
- The top connections for corrosion, greenish buildup, or drips
- The base of the tank for rust flakes or water marks
- The vent on gas models for gaps, backdraft marks, or loose sections
- The area around the T&P valve and its pipe for moisture
Make a few notes or take photos. When you talk to a plumber or your remodel contractor, these details help a lot.
2. Test hot water delivery
Pick a quiet time and run hot water in:
- A shower far from the heater
- A kitchen sink
- A bathroom sink near the heater
Time how long it takes to get hot and how long it stays hot. If you plan to add bathrooms or move fixtures, this gives you a baseline. If you already struggle with hot water now, any expansion will only stress the system more.
3. Check the drain pan and floor drain
If your heater sits in a pan, pour a small cup of water into it. See if it flows to a drain. Sometimes remodel work or previous changes left that drain disconnected.
If there is no pan, measure the space. Ask yourself if you can add one before flooring or wall work starts. It is much easier to slide a new pan under a heater on bare concrete than over finished flooring.
Coordinating with your flooring and remodel plans
One thing many homeowners skip is scheduling. Water heater work often gets pushed behind more visible projects, then suddenly blocks them.
Plan the sequence of work
A simple order that often works better:
- Assess the heater and decide on repair or replacement.
- Do any required plumbing or vent adjustments.
- Set the final heater location and height.
- Then start drywall, painting, and flooring around that fixed point.
If you reverse this, the plumber might have to cut new drywall or carefully work around fresh paint and trim.
Think about final elevation
If you add thick tile or raised flooring, the relative height of the heater changes. Gas vent slope, pipe angles, and drain pan lip height all depend on that.
Some people install the heater first, then later raise the surrounding floor. That can create a low “well” where water collects, or odd step downs. Try to picture the finished floor height before you touch the heater.
Energy and comfort upgrades while you are at it
Since you are already thinking about changes, it is a fair time to ask whether your current type and size of heater still makes sense.
Tank size vs home use
More bathrooms, bigger tubs, or more people at home usually means you need a larger tank or a different style.
Very rough idea:
| Home Setup | Typical Tank Size |
|---|---|
| 1-2 people, 1 bathroom | 30 to 40 gallons |
| 3-4 people, 2 bathrooms | 40 to 50 gallons |
| 5+ people, 2+ bathrooms, larger tubs | 50 to 75 gallons or more, or consider multiple heaters |
If your remodel adds a large spa shower and you already complain about hot water, it is not just a “comfort” thing. It affects daily life, and you might start resenting that new bathroom.
Insulation and placement
Where the heater sits in the home matters for both remodel and energy use.
Some points to think about:
- Heater in unconditioned garage or cold corner room can lose heat faster.
- Heater far from new bathrooms means longer waits for hot water.
- Moving the heater is a bigger project, but a remodel is the only realistic time to consider it.
If your planner wants to build a new storage wall or mechanical closet, think through clearances for service. The heater needs space in front for a technician to work. If you box it in too tight, future repairs become more expensive.
A few Aurora specific concerns
Every region has its own patterns. In the Aurora area, a lot of homes have basements or lower level mechanical rooms tied closely to living space. That increases the risk that water heater problems will hit finished areas.
Some quick regional notes:
- Basement finishing is common, so heaters often sit near planned family rooms or bedrooms.
- Older homes may have venting and gas line layouts that no longer meet current codes.
- Drains and sump systems vary, so not every heater has a good place to send leak water.
If your remodel includes a basement finish, do not assume the current heater setup meets current rules or best practices. A quick check before framing or drywall can save a surprise inspection delay later.
What a typical pre-remodel water heater checkup might include
If you call a plumber out before your renovation starts, a sensible scope might look like this:
- Confirm the age and condition of the tank
- Inspect for current and past leak signs
- Check gas connections and venting (for gas models)
- Test the T&P valve and drain path
- Review hot water capacity vs planned bathroom count
- Discuss whether a drain pan, seismic straps, or relocation makes sense
You do not have to accept every upgrade suggested. Some techs push more than needed. But at least you will go into the remodel with your eyes open.
Small things that make a big difference around the heater
There are some low-cost changes that pair nicely with a remodel and help manage risk.
Add or improve the drain pan
If floor height or layout allows, upgrading to a properly sized and piped drain pan is an easy win. This protects your new flooring from slow leaks. Just make sure the discharge actually reaches a working drain, not just a random hole in the slab.
Raise the heater slightly
In some setups, putting the heater on a small stand or the correct code-approved platform can:
- Protect it from minor floor moisture
- Improve access for cleaning and inspection
- Give a little extra safety margin above finished flooring
Of course, this is not something you casually do yourself with a full tank, but if the heater is already being reset during the remodel, it is worth mentioning.
Plan an access path
Think ahead about:
- How you or a technician will reach shutoff valves
- Whether you can remove the heater in the future without tearing out new walls
- Where a replacement unit could pass through doors or stairs
I have seen finished basements where the heater could not be replaced without cutting out a section of wall. It looked nice on day one, but the first heater failure turned into a bigger construction mess.
Quick Q&A to pull this together
Q: My water heater is 11 years old but working fine. I am about to redo the basement flooring. Should I wait until it fails?
A: You can, but you are accepting a real risk. At 11 years, many tanks are close to the end of their life. If the new flooring is near the heater, planning a replacement now is usually safer than gambling on a few more years.
Q: Can I just have my flooring contractor handle the heater?
A: Some contractors coordinate with plumbers, but flooring installers are usually not licensed for gas or plumbing work. It is better to have a plumber set the heater situation, then let the flooring crew finish around a known layout.
Q: Do I need to move the heater to finish my basement nicely?
A: Not always. Often you can frame a mechanical room, add a drain pan, and use smart transitions between tile and softer flooring. Moving a heater is more complex and expensive. You only do that if location is truly in the way or far from where you now need hot water.
Q: If I only have money for either nicer flooring or a new water heater, which should I pick first?
A: If the heater is older and you see any leak or rust signs, I would lean toward the heater first. Pretty flooring looks good, but not when it is buckling from water damage. On the other hand, if the heater is newer and solid, then flooring can come first.
Q: How early before a remodel should I deal with the water heater?
A: At least a few weeks before major work starts. That leaves time to get quotes, schedule any repair or replacement, and make sure everything is running smoothly before you start covering things with drywall, paint, and new flooring.
If you stand in the room, look at the heater, then look at your floor plans and imagine what a leak or surprise failure would do, what feels like the smarter step for your remodel: a quick patch, a full replacement, or a better way to protect the space around it?