So, you are trying to find handyman construction ideas to transform your floors without turning your house into a construction site for months. The simplest way to do this is to combine a few smart surface upgrades, basic repairs, and small layout tweaks that change how your floors look and feel without a full gut renovation.
That short answer sounds almost too simple, but it is true. Floors often look tired not because they are ruined, but because they are ignored. Small, focused projects add up: a patched subfloor, better transitions, a new surface in the worst areas, and maybe some layout tricks like borders or patterns. You do not always need a full rip out. Sometimes you just need a practical plan and a few solid handyman skills, or a reliable local pro who has them.
Here are some things you need to know before you start changing your floors:
- Decide if you are repairing, covering, or replacing the floor surface.
- Check the subfloor for squeaks, dips, or soft spots before any cosmetic work.
- Pick materials that match your daily life, not just what looks good in a photo.
- Use transitions and thresholds to handle tricky room changes and heights.
- Plan for moisture in kitchens, bathrooms, basements, and entry areas.
- Start in a small, low risk space before you work on the main living areas.
- Do not be afraid to mix flooring types as long as they tie together visually.
If you want help from a pro, you might hire a local bathroom remodel Lexington KY crew for the trickier parts and do the rest yourself. That mix works well for many people.
Understanding what your floor actually needs
Before you pick any new material, stop and look at what is going on under your feet.
Ask yourself a few simple questions:
- Is the floor ugly, damaged, or both?
- Do you hear squeaks when you walk?
- Do things roll by themselves on the floor, which might mean a slope?
- Are there soft spots that feel unsafe?
- Does the room feel damp or musty?
If the answer is mostly about looks, you can focus on surface projects. If you have soft spots or major squeaks, you need some structural fixes first.
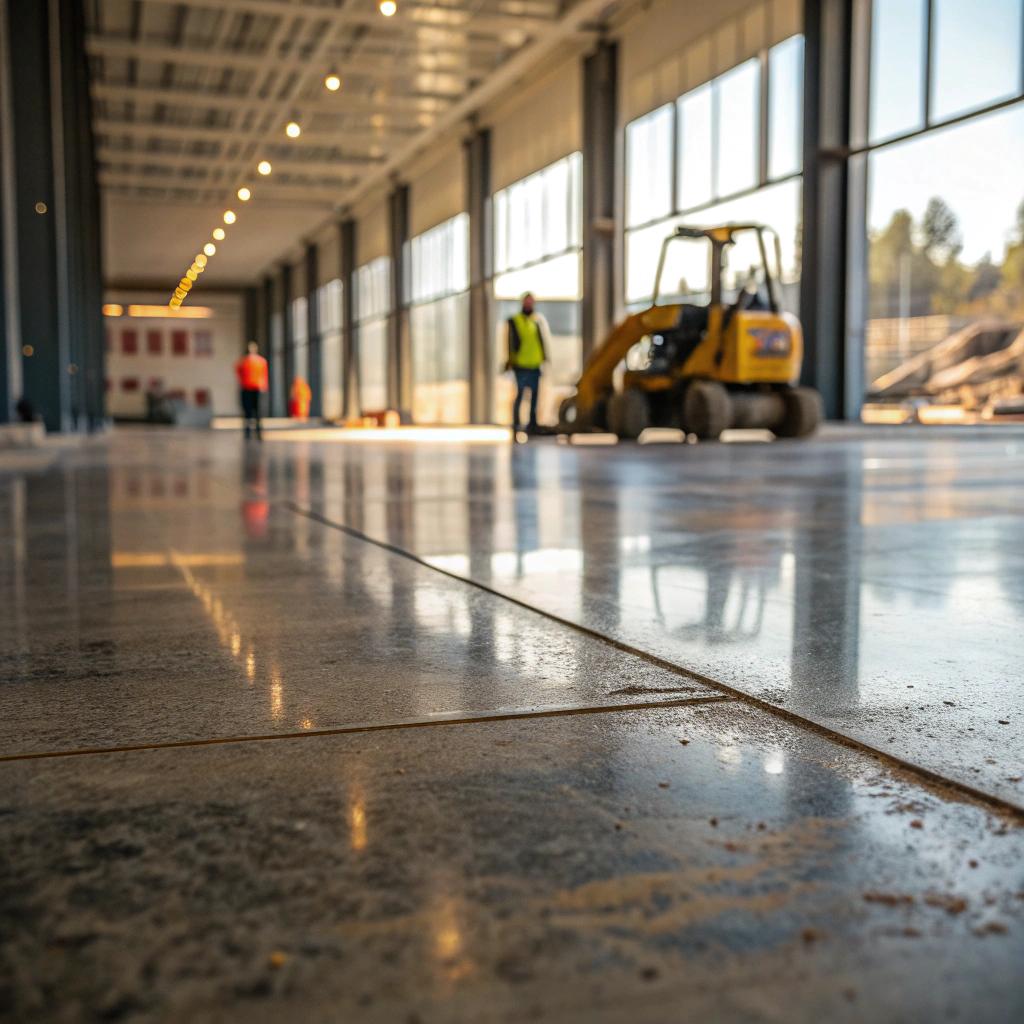
If the subfloor is weak or rotting, cosmetic upgrades will not last, no matter how nice the material is.
It is boring work, but the basic structure sets the limit for everything else you want to do.
Quick floor check: a simple table
Here is a simple way to match problems with handyman level solutions.
| Floor problem | What you probably need | Typical handyman project |
|---|---|---|
| Squeaks when walking | Fastening subfloor more tightly to joists | Drive screws from above or below, add blocking |
| Soft spots or spongy feel | Subfloor repair or partial replacement | Cut out damaged areas, patch with new plywood/OSB |
| Uneven transitions between rooms | Height adjustment and better thresholds | Install transition strips, underlayment or shims |
| Cold floors over basement or crawlspace | Insulation and air sealing | Add insulation batts, seal gaps, upgrade underlayment |
| Scratched or faded surface | Refinishing or new top layer | Sand and refinish, or float a new click floor over it |
| Musty smell or staining | Moisture source tracking and mitigation | Fix leaks, install vapor barrier, choose water resistant floor |
Simple handyman upgrades that make floors feel new
Some of the best floor changes are small projects that do not even involve new flooring. They are more about sound, comfort, and how finished the room feels.
1. Quiet the squeaks
Squeaky floors are common in older homes. They are annoying, but most of the time they are not a safety problem. The fix is usually to tighten the connection between the subfloor and the joists.
Here are common ways to do it:
- If you can reach from below, in a basement or crawlspace, find the squeak as someone walks above and add wood shims or screws through the joist into the subfloor.
- If you can only work from above, there are repair screws that snap off below the surface, which you can hide with filler.
- Sometimes even a line of construction adhesive in the seam between boards, from below, can help keep them from rubbing.
You might not remove every single squeak, and that is fine. Focus on the loud ones in walking paths and near doors. That alone changes the feel of the house more than you might expect.
2. Fix transitions and thresholds
Floor transitions are the small pieces that connect different flooring types or heights between rooms. People tend to ignore them until they stub a toe.
Good handyman work here can:
- Reduce tripping hazards at room changes.
- Make different floor materials look like they belong together.
- Cover small gaps that would collect dirt.
There are different kinds of transition strips: T-molding for floors at the same height, reducers for different heights, and stair nosing for steps. They come in wood, metal, and vinyl.
If your home has three or four different types of floors, clean, consistent transitions are what stop the rooms from looking random.
You can match these to your main floor color, or pick a neutral trim color that repeats on doors and baseboards.
3. Upgrade your underlayment
Underlayment is the thin layer between the subfloor and the visible floor. It is easy to skip, but it does a lot of work.
A better underlayment can:
- Reduce noise, especially with laminate or vinyl plank.
- Provide a bit of insulation over cold areas.
- Smooth small imperfections in the subfloor.
For example:
| Floor type | Common underlayment choice | Main benefit |
|---|---|---|
| Laminate | Foam or cork roll | Sound reduction, light cushioning |
| Luxury vinyl plank (floating) | Foam with moisture barrier | Moisture control, smoother joints |
| Engineered wood (floating) | Acoustic underlayment | Less echo, more solid feel |
| Tile | Cement board or decoupling mat | Prevents cracking and isolates movement |
Upgrading underlayment is not as visible as new flooring, but if you want a quiet house, it matters.
Flooring surface ideas you can actually pull off
Let us walk through common floor materials and what a handyman level project looks like for each. I will skip the sales talk and focus on when they make sense and when they do not.
Luxury vinyl plank or tile (LVP/LVT)
Luxury vinyl plank has grown fast in home renovation for a simple reason: it is fairly simple to install, handles moisture, and comes in a lot of looks. It is not perfect, but for many homes, it hits a nice middle spot.
Good uses:
- Basements with occasional dampness (as long as you control major water first).
- Kitchens where spills are normal.
- Rental units where toughness and easy cleaning matter.
Handyman project notes:
- Most click-together vinyl needs a flat subfloor. High or low spots can cause joints to fail.
- You can often float it over old vinyl, tile, or wood if the surface is sound.
- Leave small gaps at walls and cover them with baseboard or quarter round.
The realistic downside is that some cheaper products feel hollow or plasticky. If feel matters to you, do not pick only on color. Visit a store and walk on sample sections.
Laminate flooring
Laminate used to have a bad reputation, but it has improved. It clicks together, looks like wood from a distance, and can be a weekend project for a medium sized room.
Good uses:
- Living rooms and bedrooms where you want a wood look on a budget.
- Rooms without major moisture issues.
Handyman project notes:
- Check the moisture resistance rating. Not all laminate likes kitchens or entryways.
- Use good underlayment to avoid a loud “tap” sound when walking.
- Plan your layout so you do not end up with a very thin final row against the wall.
If you have pets with long nails, you may see scratches over time. That is where some better LVP products have an advantage.
Engineered wood
Engineered wood has a thin real wood layer over a stable base. It looks more like real hardwood than laminate does. It costs more too, generally.
Good uses:
- Main living areas when you want a higher end look.
- Spaces where solid hardwood might move too much with humidity swings.
Handyman project notes:
- Some types click together, others glue or nail down. The click types are friendlier to DIY.
- Pay attention to the thickness of the top wood layer if you care about possible future refinishing.
- Keep a stable indoor humidity range to reduce gapping.
You can mix engineered wood with tile or vinyl in nearby rooms, using transitions to make it look intentional.
Tile with handyman level prep
Tile is not always seen as a typical handyman project, but smaller spaces can be manageable if you are careful and patient.
Good uses:
- Bathrooms, laundry rooms, and other wet areas.
- Entryways where you expect muddy boots or wet shoes.
Handyman project notes:
- Use a good tile backer, such as cement board or a decoupling mat, over a solid subfloor.
- Plan the layout so cut tiles end up in less visible spots.
- Check for a consistent gap and level as you go, not just at the end.
If you are unsure, you can prepare the subfloor and backer yourself, then bring in a tile installer for the actual tile work. That split saves labor cost but still keeps the visible finish in pro hands.
Ideas for refreshing existing hardwood floors
If you already have hardwood, you might not need new flooring at all. Wood has more life in it than people think.
Screen and recoat instead of full refinishing
When floors look dull or lightly scratched, a full sand might be overkill.
A “screen and recoat” is a lighter process:
- The top finish is lightly abraded.
- New finish is applied over it.
This does not fix deep gouges or stains, but it can revive a tired floor in a day or two with less dust and cost.
Many hardwood floors are replaced not because they are worn out, but because no one realized a simple recoat could bring them back.
Spot repairs and board replacement
If you have a few damaged boards, replacing just those can be a nice handyman project.
Basic steps:
- Mark the damaged board and cut it out carefully, avoiding adjacent boards.
- Remove nails or staples from the opening.
- Cut a replacement board to fit, often trimming the bottom of the groove for easier placement.
- Fasten it and fill nail holes.
Matching the finish can be tricky. Sometimes it helps to accept a slight difference and see it as part of the floor’s story instead of obsessing over perfection. Real floors in lived in houses are rarely perfect, and that is fine.
Pattern and layout tricks that feel like construction upgrades
Some of the most effective floor changes are not about material, but about layout. They can make a small room feel larger, or tie open spaces together.
Change direction to guide the eye
How you run boards or planks affects how a room feels:
- Running boards along the longest dimension of a room tends to stretch it.
- Running them toward a window or main view can lead the eye outward.
- In a hallway, running boards lengthwise feels more natural.
You do not have to follow any strict rule, but think about where you want people to look when they enter.
Use borders to define spaces
If you have an open floor plan, you can add simple floor borders to define areas without building walls.
Ideas:
- A darker strip of wood or different plank pattern around a dining area.
- A tile “rug” at the front entry, surrounded by wood or vinyl plank.
- A border line that separates kitchen and living spaces while using the same main material.
These are not hard structural projects. They are layout choices, yet they feel like a more custom build because you do not see them in basic spec homes as often.
Mixing materials without chaos
Mixing tile, wood, and vinyl can either look intentional or messy.
To keep it under control:
- Limit the number of main floor colors in your home. Two or three is usually enough.
- Repeat similar tones. For example, a light oak vinyl in the hall and a similar toned tile in the entry.
- Use simple, straight transitions instead of odd angles unless you have a clear plan.
I have seen homes where every room had a different, unrelated floor. Even with nice materials, the house felt busy. A little restraint goes a long way.
Floors for high moisture areas: kitchen, bath, basement
Some rooms need extra thought because water is involved. This is where your choices now might save you future repairs.
Kitchen floors that can take spills
Kitchen floors see water, dropped utensils, sliding chairs, and heavy appliances.
Reasonable choices:
- Luxury vinyl plank or tile with a strong wear layer.
- Tile with grout that is sealed regularly.
- Some types of waterproof laminate, if you follow install rules.
Think about:
- Chair movement around an island or table. You might want felt pads and a tougher surface.
- Appliance leaks. A dishwasher drip can damage some materials quickly.
- Standing comfort. Tile is harder on feet if you cook a lot.
A small thing that helps is adding a defined durable area in front of the sink or stove, like a washable mat that fits the style of the room. That is not construction, but combined with good flooring, it reduces wear in the highest stress area.
Bathroom floors that handle frequent water
Bathrooms bring moisture, humidity, and sometimes kids splashing water where it should not go.
Common choices:
- Porcelain or ceramic tile.
- Sheet vinyl for simple layouts.
- Water rated luxury vinyl.
Handyman level tasks might include:
- Replacing old, cracked tile in a small powder room.
- Upgrading a vinyl floor that has curled edges.
- Adding better subfloor support around toilets or tubs if you see movement.
If you see dark staining around the toilet base or tub, do not just cover it. Find out if there is a leak. Otherwise you might trap moisture under the new floor.
Basement flooring with moisture in mind
Basements are a bit tricky. Even if you do not have standing water, you might have vapor coming through concrete. That can damage some floors quietly over time.
Better options:
- Luxury vinyl plank designed for basements.
- Interlocking tiles that allow air movement beneath.
- Sealed concrete with area rugs.
Possible handyman prep tasks:
- Check for moisture with a simple taped plastic test on the slab.
- Seal visible cracks and control bulk water first.
- Use vapor barriers as required by the flooring product.
Here, simpler can be smarter. A painted, sealed concrete floor with nice rugs is sometimes a better choice than trying to force a wood look where it will not last.
Small construction details that change how floors feel
You might not think of these as floor projects at first, but they matter a lot. They are the finishing details that connect your floors to the rest of the room.
Baseboards and trim refresh
Old baseboards with chipped paint or gaps can make a new floor look less impressive. Refreshing them is a classic handyman task.
Ideas:
- Replace skinny builder grade baseboards with taller ones for more presence.
- Caulk gaps between baseboard and wall for a cleaner line.
- Repaint in a durable semi gloss finish.
If you only change the floor surface and ignore the baseboards, the room can still feel halfway done.
Floor vents and registers
Floor registers often end up mismatched and dented. It is a small thing, but highly visible.
You can:
- Replace metal registers with models that match your new floor color.
- Use flush mount wood vents in hardwood areas for a more continuous look.
- Clean and repaint metal vents that are structurally fine but ugly.
This kind of detail sits right inside your new floor, so it deserves more attention than most people give it.
Lighting and how it hits the floor
This might feel a bit off topic, but light strongly affects how your floor looks. For example, plank floors running perpendicular to a long window can show fewer visual seams than those running parallel.
You can:
- Check how sample boards look at different times of day before committing.
- Aim lighting so it does not highlight every small surface flaw.
- Use warmer light temperatures if you want wood tones to feel richer.
I have seen people panic about hairline floor imperfections that are only visible under one strong, low angle spotlight. Sometimes you fix the light instead of the floor.
Planning, budgeting, and when to call in help
Even if you are handy, not every floor project makes sense as a DIY job. Some are better split with a pro.
Decide what you can realistically do yourself
Be honest about:
- Your available time.
- Your tools.
- Your tolerance for small mistakes.
Good DIY or handyman style tasks:
- Removing old carpet and staples.
- Fixing squeaks from below when you can reach joists.
- Installing click-together vinyl or laminate in simple rooms.
- Replacing or repainting baseboards and quarter round.
Projects where you might want more help:
- Large, complex tile layouts.
- Full hardwood sanding and refinishing.
- Major subfloor repair across a big area.
- Floors with structural issues from water damage.
Sometimes the best mix is to do the slow demolition and prep yourself, then hire pros for the skilled finish work. That way, your budget goes where it has the most impact.
Rough budget planning table
Costs vary a lot by area, but here is a simple way to think about material and project level.
| Floor approach | Material cost level | Typical labor level | Project type |
|---|---|---|---|
| Luxury vinyl plank over sound subfloor | Low to medium | Low to medium | Handyman or DIY friendly |
| Laminate with new underlayment | Low | Low | Handyman or DIY |
| Engineered wood click floor | Medium to high | Medium | Experienced handyman or pro |
| Tile in a small bathroom | Medium | Medium to high | Handyman with tile skills or pro |
| Full hardwood refinish | Low (materials) | High | Usually pro |
| Subfloor repair plus new floor | Medium | High | Pro or advanced handyman |
Practical sequences: where to start in a real house
Let me give you a few realistic sequences. Imagine you are walking through your house and planning where handyman level flooring work will make the most difference, with the least chaos.
Scenario 1: Tired living room carpet
You have an old living room carpet. It smells a bit and holds stains. The subfloor is probably OK, but you are not completely sure.
A practical sequence:
- Pull a corner of the carpet in a closet or edge to check the subfloor condition.
- If it looks solid and dry, plan to remove all carpet and padding.
- Walk the bare floor, find squeaks, and fix them with screws from above.
- Patch any small damaged spots in the subfloor.
- Install foam underlayment and a click-together floor such as LVP or laminate.
- Reinstall or replace baseboards and add quarter round for a clean look.
Result: new floor, quieter, no carpet, and a room that feels refreshed without touching walls or ceilings.
Scenario 2: Mixed floors on a main level
Your main floor has three types of flooring: old tile in the kitchen, laminate in the living room, and worn vinyl in the hall. They do not match.
A more staged plan:
- Pick one material that works in most dry areas, such as a good vinyl plank.
- Start with the hallway. It is smaller but connects everything.
- Next, replace the living room floor with the same material and create clean, straight transitions to the kitchen tile.
- If the budget allows later, retile or refloor the kitchen with a matching or closely related tone.
- Upgrade transitions at each step so the change looks planned, not temporary.
This way, your home improves in stages, not all at once. Each stage still feels complete.
Scenario 3: Basement that feels like a storage unit
Your basement has bare concrete and random old rugs. It feels more like a storage space than living space.
Possible sequence:
- Check for moisture issues and fix any active leaks.
- Clean and repair cracks in the slab.
- Decide if you want a full floor or a partial improved zone.
- For a full floor, pick an LVP product rated for below grade use and install with the right underlayment.
- For a partial zone, seal and paint the concrete, then place large rugs in seating or workout areas.
- Add simple baseboards where walls meet the floor to frame the space.
That can turn a rough basement into a usable family room, game area, or home gym without framing new walls.
Common mistakes to avoid when upgrading floors
You are probably tired of hearing only the positive side, so here are a few honest mistakes I see often.
Chasing trends instead of your lifestyle
Floor trends change. What feels current now might look dated in a few years. That is not a disaster, but it feels worse if the material also does not match how you live.
Examples:
- Very light floors in a house with kids and dark pets can show dirt more often.
- Super glossy finishes highlight every scratch in high traffic areas.
- Very wide boards can show more movement in unstable humidity conditions.
If you are torn between two looks, it might help to ask: which one works better on a typical messy day, not a photo shoot day.
Ignoring door clearances and trim
Thicker new flooring can make doors rub or not close at all. It is easy to forget this in planning.
Before you install:
- Measure the new floor thickness with underlayment.
- Check how much clearance you currently have under doors.
- Plan for trimming doors if needed.
Undercutting door casings so the new floor slides under them also makes the end result look more professional.
Skipping small gaps where they are needed
Floating floors such as laminate and LVP need expansion gaps at the perimeter. People sometimes push them tight to walls to avoid using trim, then see buckling later.
Follow the product instructions on:
- Gap size at walls and fixed objects.
- Maximum run length before you need breaks or transitions.
- Climate conditions during and after install.
Cutting corners here often leads to repairs that cost more time than you saved.
Q & A: A few common floor upgrade questions
Q: Should I replace floors before or after a kitchen or bathroom remodel?
A: For full remodels, it usually makes sense to rough in plumbing, electrical, and cabinets first, then install the final floor surface, then baseboards and trim. That way, you do not damage a new floor while moving heavy items. For lighter refreshes, such as painting cabinets, you can often do the new floor first and protect it with cardboard or hardboard while you work.
Q: Is it worth spending more on underlayment if I am already buying a good floor?
A: In many cases, yes. Underlayment is not very visible, but it affects how solid and quiet the floor feels. In multi level homes or condos, sound control is especially important. A basic foam might be fine in some cases, but a better acoustic underlayment can be a noticeable upgrade without a huge extra cost per square foot.
Q: Can I mix carpet with hard floors in the same open space?
A: You can, but it needs a clear edge and a logical reason. For example, a defined carpeted seating area next to a hard surface dining area can work. Use a metal or low profile transition strip and keep the color palette related. If the room is small, too much mixing might make it feel fragmented rather than cozy.