
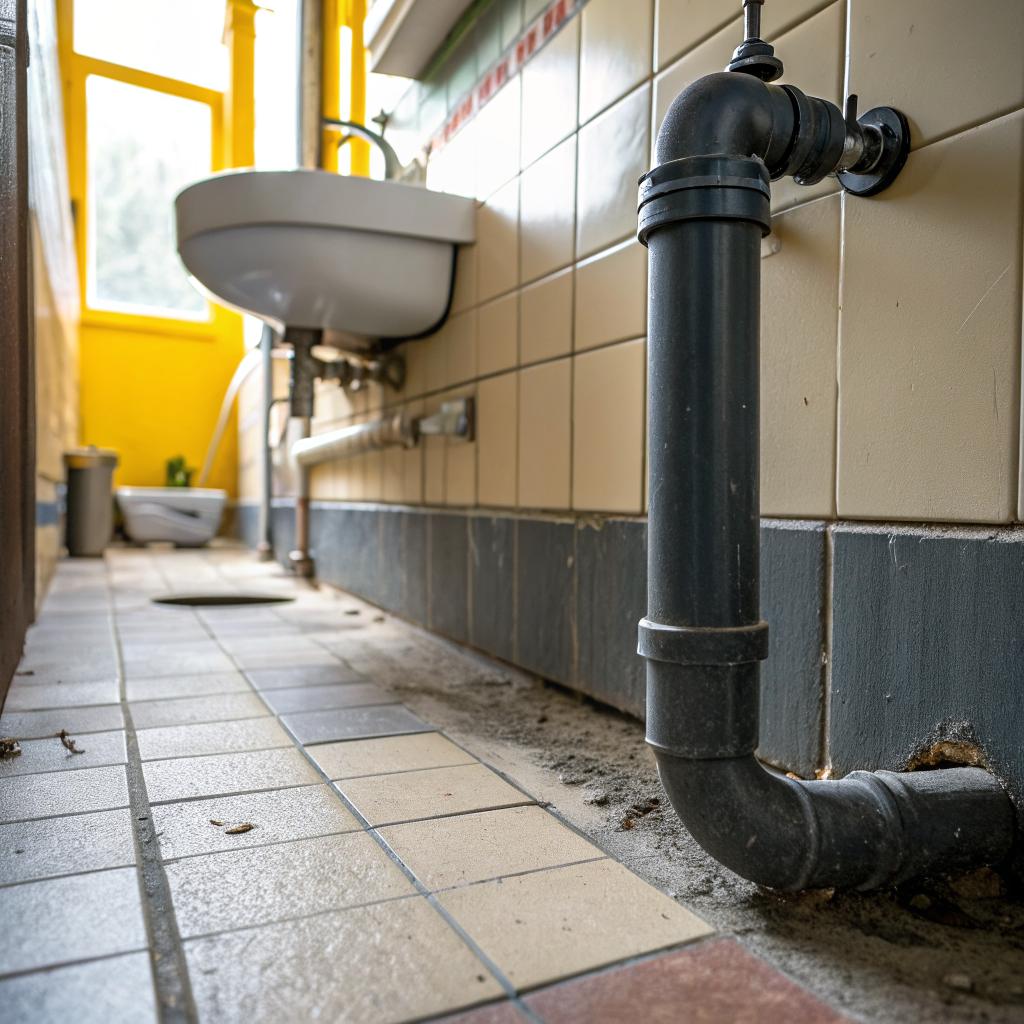
So, you are trying to get your drains remodel ready before you start tearing out walls, moving plumbing, and putting in new flooring. The direct answer is: you need to inspect, clean, and often upgrade key drain lines before the remodel begins, or you risk backing up wastewater into your new finishes and floors.
Most people focus on cabinets, tile, and layout. The hidden stuff under the floor and behind the walls feels boring, until it floods your new vinyl plank or warps your hardwood. If you deal with slope, venting, pipe size, and existing clogs before the first tile is laid, your project runs smoother and you avoid cutting into brand new work later. A local pro like Spartan Plumbing Colorado will usually say the same thing: treat the drains as part of the remodel design, not an afterthought.
Here are the main things you need to know before you start:
- Old or undersized drains can ruin new flooring and cabinets if they back up.
- Drain layout should be planned with the same care as the new layout of walls and appliances.
- Vent lines and slopes matter just as much as pipe size.
- Pre-remodel drain cleaning is often cheap insurance against later damage.
- Bathroom and kitchen remodels are the best time to correct long-standing drain issues.
- Some changes need permits and inspections, especially if you move fixtures.
- A slow drain right now will become a real problem once you close up the walls.
Why remodel ready drains matter for flooring and finishes
If you are on a site that talks a lot about flooring, you already know water is one of its biggest enemies. Soft subfloor, cupped boards, lifted vinyl edges, ruined grout lines. Most of that damage starts quietly with one thing: a drain that did not handle what you sent through it.
Let me lay out a simple picture. You install new:
- Luxury vinyl plank in a basement bathroom
- Custom tile shower
- Underlayment and new plywood in the kitchen
The project looks good. Then an old cast iron branch line under the slab develops a partial clog. Showers drain slowly, the toilet gurgles, and one day the floor drain belches up sewer water. You do not just have a plumbing problem. You now have a flooring problem plus a possible mold problem around cabinets and underlayment.
If you do not trust your drains to handle heavy use, you should not trust them under new high-end floors and cabinets either.
Remodel ready drains protect three things:
- Your flooring investment
- Your indoor air quality
- Your day-to-day comfort after the remodel is done
Some people try to skip this and “see how it goes.” That approach usually works right up until it does not. Then you cut open something new you already paid to finish.
Step 1: Look for warning signs before you demo
So, how do you know your drains need work before the remodel? You do not need fancy tools for the first pass. You just need to pay attention.
Check for everyday drain problems
Walk through the spaces you plan to remodel and honestly answer a few questions.
- Do any fixtures drain slowly, even after using basic store products?
- Do you hear gurgling when the washer runs or when a toilet flushes?
- Do you ever smell sewer gas in the bathroom, laundry, or kitchen?
- Has any floor drain ever backed up during heavy rain or heavy use?
- Do you have older galvanized or cast iron lines that have never been cleaned or scoped?
If you answer yes to even one of these, your drains are already trying to tell you something.
Any gurgling, sewer smell, or repeated slow drain is a red flag. You should not bury that problem behind new walls or under new floors.
Look at the age and material of your pipes
If you are in an older Colorado home, there is a chance your residential plumbing system is a patchwork of:
- Cast iron
- Galvanized steel
- Copper
- ABS or PVC
Each has its own issues:
| Pipe type | Common problem | What it means for a remodel |
|---|---|---|
| Cast iron | Scaling, internal rust, cracks | Often worth scoping and sometimes replacing while walls are open |
| Galvanized | Restricted flow, corrosion | High risk of future clogs and leaks, bad match for fancy new finishes |
| ABS/PVC | Improper slope, bad glue joints | Layout might need correction or re-supporting during remodel |
| Copper (for drains, rare) | Pinhole leaks, corrosion | Usually replaced with modern drain materials when found |
If you do not know what you have, look in an unfinished basement or under a sink, or check behind an access panel. The time to investigate is before you sign off on the remodel scope.
Step 2: Plan the drain layout with the new design
People often design the new kitchen or bathroom completely, then hand it to a plumber and say “make the drains work.” That is backwards. The drain layout should be part of the design, especially in tight spaces or when you move fixtures.
Think about fixture locations in real space
When you move a fixture, you move its drain and vent. Some moves are simple, some are not.
- Shifting a vanity 10 inches is usually simple.
- Moving a toilet to another wall can be a big job.
- Flipping a tub so the drain side changes can affect joists and slope.
Ask yourself:
- Is there enough drop between the fixture and the main drain for proper slope?
- Will the new layout create long horizontal runs that might clog more often?
- Will new cabinets or flooring make access to cleanouts harder?
If your layout ignores slope and venting, no tile, flooring, or cabinet choice will save you from a drain that never quite works right.
Watch out for structural conflicts
Drains usually want to follow gravity and take the shortest path. Floors and joists want to stay strong. Those two goals conflict sometimes.
Cases where this happens:
- Second floor bathroom over finished living space
- New island sinks that need a long run to reach an existing stack
- Curbless showers that need a very precise slope under large format tile
Before you commit to the exact layout, you or your plumber should check:
- Joist direction and depth
- Where your main stack and branch lines actually run
- Where existing vents exit the roof
Sometimes you can keep your dreamed layout. Sometimes a small adjustment, like flipping a shower head wall or sliding an island by a foot, can make the plumbing much more practical.
Step 3: Clean and inspect drains before rough-in
Once you know the basic layout, you want to start with clean, known-good lines.
Why pre-remodel drain cleaning is worth it
Even if your drains feel “fine,” they may already have build-up. Remodels tend to add more stress:
- Construction dust and debris can find its way into open pipes.
- Workers sometimes rinse compound or grout into sinks they should not use.
- Added fixtures put more load on old lines.
A professional cleaning is not just about today’s slow drain. It also gives a good base line. For example, if you hydro jet a kitchen line before the remodel, then a year later it slows again, you know the problem is new and not old buildup.
Here are common cleaning methods:
| Method | Best for | Notes |
|---|---|---|
| Hand or power snake | Single clogs, hair, small blockages | Good for sinks and tubs; may not remove all grease buildup |
| Hydro jetting | Grease, scale, long lines | Great pre-remodel choice for main kitchen and branch lines |
| Enzyme treatments | Maintenance after cleaning | Not a fix for serious blockages, more like a gentle helper |
Your goal here is simple: clean pipes before you hide them with finishes.
Camera inspection: see what you are dealing with
If you are planning a major kitchen or bathroom remodel, camera inspection is very hard to argue against. It can reveal:
- Offsets or sags in the line
- Roots in older outdoor or under-slab pipes
- Loose joints or cracks
- Build-up that cleaning alone did not fix
This is one of those steps that some homeowners skip because “it adds cost.” But so does tearing out a new tiled shower pan because the line underneath has a sag that nobody knew about.
If the scope shows serious defects under a part of the house you are already opening, you get the chance to fix it while the disruption is acceptable. That is the whole point of a remodel ready approach.
Step 4: Size, slope, and vent your remodel drains correctly
This part does not look glamorous in photos, but it decides how well your shiny new space will work.
Pipe size by fixture
Local code controls a lot of this, but here are common sizes you will see in many homes. Check your local rules of course, but this gives a general sense.
| Fixture | Typical drain size | Notes |
|---|---|---|
| Bathroom sink | 1 1/4 or 1 1/2 inch | Often transitions to 1 1/2 or 2 inch in wall |
| Shower or tub | 2 inch | Helps handle hair and soap without clogging as fast |
| Toilet | 3 or 4 inch | Size and slope matter for good, full flushes |
| Kitchen sink | 2 inch | Grease and food waste need a generous, smooth line |
| Washer drain | 2 inch | High volume discharge needs correct size and venting |
If your remodel opens up walls and reveals tiny, constricted lines serving major fixtures, that is your cue to upgrade.
Proper slope so water actually moves
Gravity is the engine for most residential drains. You want a slope that is not too flat and not too steep. Yes, too steep can be a problem because water outruns solids.
Many codes aim for around 1/4 inch drop per foot for small horizontal drains. Long runs sometimes can be slightly less, but that is not something you want to guess on.
Common slope mistakes during remodels:
- Trying to “cheat” a long run with almost no fall to avoid mods to joists
- Excessive slope near the fixture, then no slope at the far end
- Creating little bellies in the line that hold standing water
Once that pipe is buried under tile backer and hardwood, you are stuck with whatever slope you have. So the rough-in stage is when this must be corrected.
Venting so drains do not gurgle or trap-seal
Vent lines let air into the system so water can flow without creating a siphon. Poor venting shows up as:
- Gurgling after a flush or when nearby fixtures run
- Traps that lose their water and let sewer smell in
- Bubbles in toilets when other fixtures drain
Remodels often fail here when someone removes or moves walls without planning how vents will reconnect. Or when a DIY project hides a vent in a way that breaks code.
If you move a fixture far from an existing vent, you may need:
- A new vent line up through the roof
- A re-route to tie into an existing vent in a different spot
- Under some conditions, an air admittance valve, if allowed in your area
This is not the most fun part of the design. But it is what stops your nice new bathroom from smelling like a sewer on a hot day.
Step 5: Protect drains during construction and flooring work
Once rough-in is done, you are not finished caring about drains. The remodel process itself is risky for your pipes.
Cap and cover everything
Open drain stubs and cleanouts are magnets for:
- Drywall dust
- Screws and nails
- Small bits of tile or grout
- Wood shavings
Those little pieces can create future clogs in tight elbows and small traps. Ask your plumber or contractor to:
- Cap or tape off all open drain stubs
- Cover floor drains while grinding or cutting concrete
- Keep toilet flanges covered until final install
This feels a bit trivial, but I have seen enough projects where a nail or a tile chip became the “mystery clog” a month after move-in.
Protect floor drains and trap primers
Some remodeled spaces add more floor drains:
- Basement laundry room
- Mechanical room with water heater and boiler
- Large walk-in showers or wet rooms
If the drain has a trap primer or connection from a nearby sink to keep water in the trap, make sure the remodel crew understands not to remove or block that. A dry trap defeats the whole point of a floor drain.
Also think about drain covers and grates. They need to:
- Sit flush with the final flooring height
- Match the material around them for slip resistance
- Be removable for cleaning
This is where good coordination between the plumber and flooring installer matters. If that does not happen, you end up with a grate that is proud of the tile or sunken below the vinyl, which is both ugly and a trip point.
Tips by room: kitchens, bathrooms, laundry, basements
Different parts of the house stress the drains in different ways. Your remodel plan should reflect that.
Kitchen remodel drains
Kitchens are usually the worst spot for greasy buildup. A remodel is the time to improve:
- Pipe size and material from the sink to the main line
- Placement and elevation of the dishwasher drain line
- Position of the cleanout for future service
Good habits help too:
- Scrape plates into the trash before rinsing.
- Avoid pouring large amounts of oil down the sink.
- Run hot water during and after using the disposal.
If you are adding an island sink, be cautious. Island venting is tricky, and the long horizontal run under the floor must have a proper slope. This is not an area to “wing it.”
Bathroom remodel drains
Bathrooms mix many fixtures in a tight space. Common bathroom remodel drain upgrades include:
- Upsizing shower drains to 2 inch where old lines were smaller.
- Reworking the toilet branch to remove odd offsets or long flat runs.
- Improving or adding vents to prevent gurgling.
Showers deserve special care:
- Linear drains need careful framing and precise slope of the whole floor.
- Curbless showers add comfort but reduce “forgiveness” if slope is poor.
- Hair catchers in the new drain can save you many snaking sessions.
Remember that a bathroom vanity move might require changes in the wall cavity for venting and drain height. If the plumbing is too low or too high for the new cabinet, you end up with awkward holes or unplanned patches.
Laundry and utility room drains
Washers discharge water quickly. If the standpipe or the line it ties into is struggling, it will show as:
- Water backing out of the standpipe
- Gurgling in nearby sinks
- Slow draining tubs in the same branch
A remodel often brings:
- A larger or newer washer with higher output
- Relocation of the laundry area, especially into finished basements
For remodel ready laundry drains, pay attention to:
- 2 inch standpipe and trap size
- Firm support and height of the standpipe
- A direct and short connection into a properly vented branch line
If you add a floor drain in the laundry room, think about where it ties in and how slope in the room will direct water toward it. This connects directly to how your flooring contractor shapes the underlayment.
Basement and lower level drains
Basements are where drain failures often hit flooring the hardest. Especially finished lower levels with:
- Carpet or pad
- Engineered wood
- Laminate or vinyl plank
Below-grade plumbing usually involves:
- Lift pumps or ejector pits
- Backwater valves in some homes
- Long runs under the slab to the main sewer
Before a basement remodel, at minimum, you want:
- Your main line inspected and cleaned.
- Any pump system checked, cleaned, and tested.
- Backwater valves checked for operation if you have them.
It is frustrating to finish a beautiful basement and then learn that a $300 valve or a simple root intrusion is all that stands between you and a sewer backup. This is why many plumbing companies push for a pre-remodel inspection, and they are right on this one.
How drains and flooring choices interact
Since this is going on a renovation and flooring site, it is worth connecting the two in a straightforward way. Your drain decisions affect flooring choices, and the reverse is also true.
Hardwood and laminate near wet areas
If you are putting hardwood or laminate in a kitchen, powder room, or hallway near a bathroom, you should be stricter about drains. Any leak or backup that spreads onto that floor can lead to:
- Cupping or warping
- Swollen edges on laminate
- Mold growth under the planks
In spaces with water sensitive flooring near plumbing, ask yourself:
- Are there any known slow drains that could overflow?
- Is there a shutoff and easy access to fixtures for quick action?
- Does the homeowner understand not to ignore early warning signs?
Some people argue that “it has always been fine,” but that period before a remodel is when you should be less trusting, not more.
Tile, grout, and shower pans
Tile is more water tolerant than wood, but it is not magic. If a drain under a tiled shower is slow or the slope is poor, you might get:
- Standing water and staining
- Mildew in grout lines
- Water migrating to edges or transitions to other flooring
The tile installer and plumber have to sync on:
- Height of the drain rough
- Final drain grate elevation
- Slope direction and consistency
If the plumber drops the rough drain lower than expected, the tile installer may have to build up more mud bed, which can alter threshold heights. These are small details, but they change how your remodel feels day to day.
Concrete and epoxy floors over sewer lines
Some basement remodels keep the concrete floor and add stains, epoxy, or overlays. People often forget what runs under that slab. If you have a known trouble spot in the main sewer line, finishing the floor without fixing it is like sealing a problem inside concrete.
Consider:
- Repairing or lining bad sections before you pour or coat.
- Adding access points where you can reach with a snake or jetter.
- Marking where the main line runs before final finishes.
It is not particularly fun to core drill through a new epoxy floor to reach a collapsed section that got ignored during the planning stage.
Common remodel drain mistakes to avoid
You can learn a lot by looking at problems that come up again and again.
Relying on “temporary” drains that become permanent
Sometimes during a remodel someone says:
- “We will just tie this shower into that old 1 1/2 inch line for now.”
- “We will vent this sink later when we redo the roof.”
Then the remodel finishes, everyone gets busy, and the “for now” becomes “forever.” Those are the drains that gurgle, clog, or fail a few years later.
Any drain or vent solution that is not good enough for the finished remodel should not be used as the “temporary” solution during it either.
Ignoring code because “it is just a small change”
Relocating a sink, adding a shower, converting a half bath to a full bath, or adding a basement wet bar are all changes that can affect how much load your system carries. Code rules are often based on fixture counts and pipe sizes.
Skipping permits is common, but that does not mean it is wise. If something goes wrong and there is insurance involvement later, undocumented changes can add stress you do not want in an already messy situation.
Letting different trades work without coordination
The remodel might involve:
- Plumbers
- Flooring installers
- Carpenters
- Tile setters
Without a bit of planning, you get:
- Toilet flanges at the wrong height for the final floor.
- Drain openings not centered in shower footprints.
- Drains that end up partly under cabinets or awkwardly close to walls.
A simple walkthrough with a tape measure and the final flooring thickness in hand can avoid a lot of rework.
Simple checklist for remodel ready drains
Here is a compact checklist you can use during planning. You can adjust it to fit your project size.
Before design is final
- List all fixtures that will feed into your drains after the remodel.
- Note any current slow drains, smells, or gurgles.
- Identify pipe materials and obvious old or corroded sections.
Before permits and contracts
- Have main and critical branch lines cleaned if they are older or have a history of problems.
- Order a camera inspection for main or suspect lines, especially in basements.
- Discuss drain and vent layout with your plumber, not only the fixture locations.
During rough-in
- Confirm pipe sizes for each fixture match current standards and code.
- Check visible slopes where you can before floors and walls close.
- Verify that vents are routed cleanly and not compromised by new framing.
Before flooring and finishes
- Make sure all open drains are capped during messy work.
- Confirm drain heights match the final flooring thickness and underlayment.
- Test all fixtures under load once they are hooked up, not weeks later.
Quick Q&A to tie it together
Q: My drains seem fine now. Is pre-remodel cleaning and inspection still worth it?
A: I think in many cases, yes, especially for older homes or bigger remodels. “Fine” is vague. If you are investing in new flooring, tile, and cabinets, paying once to confirm that your hidden pipes are clear and structurally sound is a small extra cost compared to fixing issues later.
Q: Can I just use chemical drain cleaners before the remodel instead of hiring someone?
A: That is usually a weak substitute. Chemical cleaners can sometimes clear simple clogs, but they do not remove heavy scale or deep grease, and they do nothing about poor slope, roots, or cracks. They can also be harsh on older metal pipes. Mechanical cleaning and camera inspection give you actual information.
Q: How early in the remodel process should I involve a plumber?
A: Right after you have a rough sketch of your new layout, before you lock in cabinet orders or flooring transitions. Waiting until framing is done can force awkward plumbing runs or limit what your drains can realistically support.
Q: Can flooring choices reduce my drain risk?
A: Slightly, yes. Waterproof or water resistant floors in wet areas are more forgiving if a drain issue happens. But they do not fix the root cause. They just give you a bit more time to notice and respond before damage spreads. The drain still needs to perform.
Q: What is the single most common drain mistake you see during remodels?
A: Probably ignoring existing warning signs. A slow kitchen line, recurring clogs in a basement bathroom, or old cast iron with visible corrosion gets covered up because “we are already over budget.” Then that same section fails under brand new work, which costs even more. If you have one clear red flag, start by addressing that before you pick tile samples.