
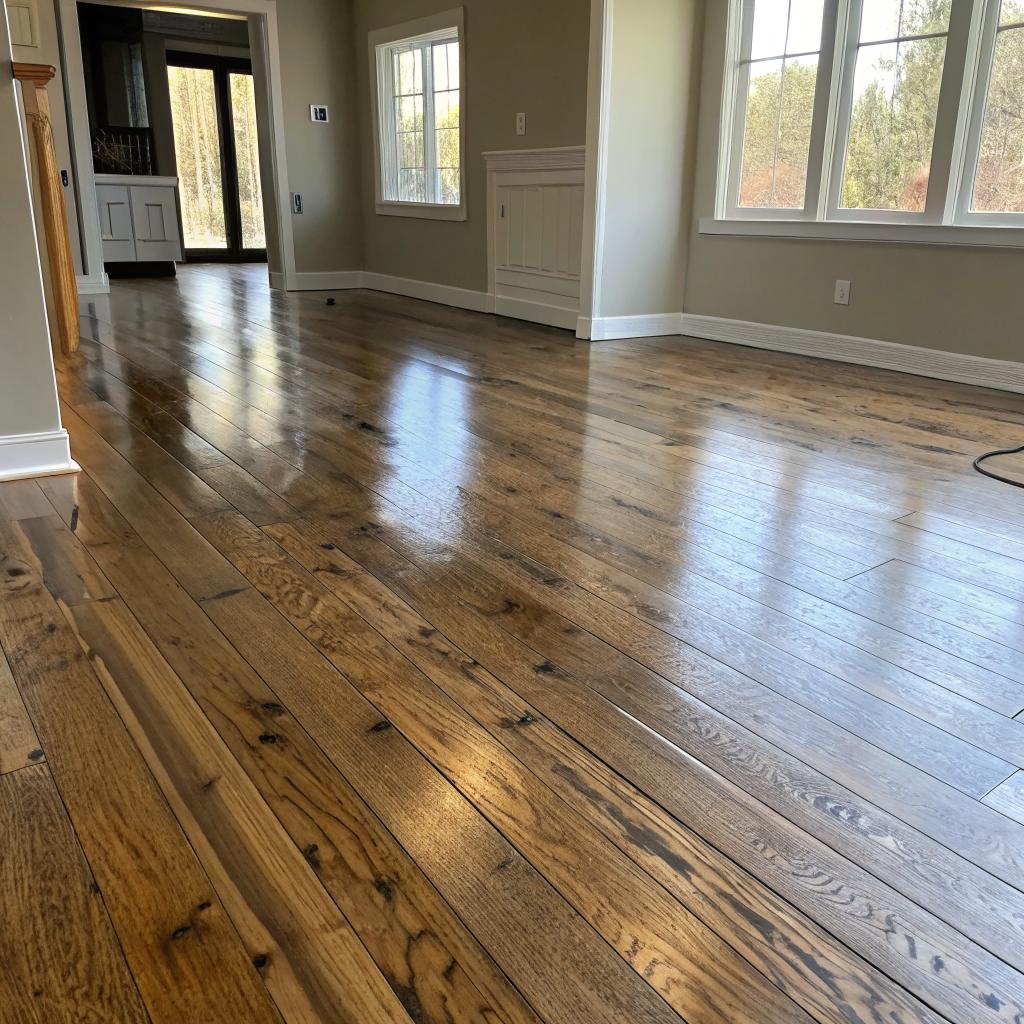
So, you are trying to get real, practical Denver hardwood installation tips for stunning floors in your home. The short answer is that great hardwood floors in Denver come down to planning for our dry climate, choosing the right material, letting it acclimate, preparing the subfloor properly, and then installing with care and patience.
You are not just laying boards. You are dealing with Denver’s altitude, low humidity, and temperature swings. Those things affect how wood moves, how fast it dries, and how long your floor will stay flat and quiet. If you skip steps, you might not notice it in the first week, but in six months you could see gaps, squeaks, or cupping. So think of this as a slow, careful project, not a weekend rush job.
Here are the main things you need to keep in mind before you start.
- Plan for Denver’s dry climate and big temperature swings
- Choose between solid and engineered hardwood based on your home and lifestyle
- Acclimate the wood longer than generic instructions suggest
- Test and fix subfloor moisture and flatness before a single board goes down
- Decide on nail, glue, or floating installation for your exact conditions
- Leave proper expansion gaps and think about floor transitions
- Match finishes and colors to real life, not just the showroom
- Plan for future refinishing right now, not after it is too late
- Know when a pro is worth the money and when DIY makes sense
Understanding how Denver’s climate affects hardwood
If you have lived in Denver for a while, you already know how dry the air can be. That same dryness that cracks your lips can shrink your hardwood.
Wood is hygroscopic, which is a fancy way to say it reacts to moisture. It expands when it absorbs moisture and contracts when it loses it. In a coastal city, you fight excess moisture. In Denver, you often fight the opposite: dry air that pulls moisture out of the boards.
Here is a simple way to look at it:
| Condition | What it does to wood | What you tend to see on the floor |
|---|---|---|
| Very dry indoor air (winter, heated homes) | Wood loses moisture and shrinks | Gaps between boards, small cracks at ends |
| More humid periods (summer storms, monsoon pattern) | Wood gains moisture and swells | Light cupping or edges slightly higher than center |
| Rapid swings (heat then cool, dry then humid) | Wood moves back and forth | More squeaks, unstable boards, finish stress |
So the big question is not “Can hardwood work in Denver?” It can. Many homes here have had it for decades. The question is how you plan for that movement so your floor stays attractive and does not drive you crazy with noise or gaps.
If you treat hardwood like a fixed, solid surface that never moves, it will punish you. If you treat it like a natural material that breathes with the room, you can keep it stable and attractive.
Choosing the right hardwood for a Denver home
This is where a lot of people get stuck. You walk into a showroom and see a beautiful 5 inch wide solid oak plank and think, “Yes, that.” Then you hear about engineered hardwood and start to second guess everything.
Let us break it down.
Solid vs engineered hardwood in a dry climate
Solid hardwood is one single piece of wood, top to bottom. Engineered hardwood has a hardwood wear layer on top and layered plywood or high quality backing underneath.
Here is a quick comparison that is relevant for Denver conditions:
| Type | Best for | Pros | Cons |
|---|---|---|---|
| Solid hardwood | Above-grade rooms with stable humidity |
Thicker wear layer Can be refinished more times Classic feel underfoot |
More movement in dry / humid swings Needs more careful humidity control Not ideal directly over concrete slabs |
| Engineered hardwood | Basements, slab homes, wider boards |
More stable with humidity changes Better for wide plank styles Works over more subfloor types |
Fewer full refinishes for thin wear layers Quality varies a lot by brand Can feel slightly different underfoot |
If you want wide planks, say 6 inches or more, and you live in metro Denver, engineered hardwood is usually safer. The layered structure fights cupping and gapping better than solid, especially when the air dries out.
That said, solid hardwood still works well in many Denver homes, especially if you are OK with keeping indoor humidity somewhat controlled.
Species that behave better here
Some wood species move more than others. On average, harder, tighter grained woods give fewer surprises.
Common options for Denver homes:
- White oak: Stable, popular, takes stain well.
- Red oak: Traditional look, more grain, also reliable.
- Maple: Hard and smooth, but can show finish flaws, so prep matters.
- Hickory: Very hard, rustic look, lots of color variation.
- Walnut: Softer than oak but beautiful, often used in living rooms and bedrooms.
I would avoid very soft woods if you have kids, big dogs, or heavy traffic. And yes, people still pick them, but they dent easier and can look tired fast in active homes.
If you love a species that is a bit softer or more active, you can balance that by choosing a sturdier finish or a more forgiving color and sheen level.
Planning your Denver hardwood installation
This is the part people often skip. They just want to get to the “install day”. But planning shapes everything: cost, timeline, and how your floors age.
Think about your home, not a showroom picture
Ask yourself a few questions:
- Do you want one continuous floor across several rooms, or separate areas with transitions?
- How much natural light hits the floor during the day?
- Are you planning floor heat now or in the future?
- Is your subfloor wood, concrete, or a mix?
- How long do you plan to stay in the home?
Long, open areas with a lot of light can show every board movement and every line. That usually favors stable products and very careful layout. Smaller rooms are more forgiving.
Budget reality check
People often focus on the price of planks and forget everything else. With hardwood, labor and prep can be as big a deal as the material.
Your cost buckets usually look like this:
- Material: planks, underlayment, adhesives, fasteners
- Subfloor prep: leveling, repairs, moisture control, removal of old flooring
- Installation: actual labor or your own time and tools
- Finishing or refinishing: stain, sealer, topcoats, sanding equipment
- Trims and transitions: baseboards, shoe molding, thresholds
People sometimes save on material and then end up overspending on labor because the product is harder to work with. Or they pick a DIY friendly product and then realize their subfloor is far from flat and needs a lot of attention.
Acclimating wood in Denver: longer than you think
Most boxes of hardwood have generic instructions like “acclimate for 48 to 72 hours.” In Denver, that is often not enough.
The goal of acclimation is not to hit a magic number of days. It is to let the wood reach equilibrium moisture content with the room where it will live.
Here is a basic approach that fits Denver conditions better:
- Get your HVAC running as it normally will during the year. That means if you will use air conditioning in summer and heat in winter, set the system to those normal living levels before the wood arrives.
- Bring the hardwood into the house, remove it from plastic, and stack it with space between layers. Use spacers, not tight piles.
- Let it sit for at least 5 to 7 days, sometimes longer in colder or very dry seasons.
- If you can, check moisture with a meter in both the subfloor and the hardwood. Your goal is to have them fairly close.
If your subfloor and hardwood are way out of sync in moisture, do not start installing. That mismatch is where a lot of future gapping or cupping begins.
I know it feels slow. But once the planks are nailed or glued down, they are not free to move on their own. Any stress from shrink or swell shows up as noise, cracks, or shape changes.
Subfloor prep for Colorado homes
You will rarely hear someone say, “I wish I had spent less time on subfloor prep.” Most regrets go the other way.
Denver homes can have older plywood, OSB, or concrete slabs that have seen a lot of temperature shifts. You need to bring that surface into shape before laying any hardwood.
Checking moisture
Moisture is not as obvious in Denver as in a coastal city, but it still matters, especially on concrete.
Basic checks:
- For concrete slabs: use a proper moisture test kit or at least a meter. Do not rely on the “tape plastic to the floor and see if it sweats” trick alone.
- For wood subfloors: check several spots, especially around exterior walls, bathrooms, and kitchens.
If the readings are too high for the hardwood manufacturer’s range, you need to solve that first. This might mean subfloor drying time, vapor barriers, or changes to your underlayment plan.
Flatness and structure
Hardwood wants flat, not just “looks OK.”
Manufacturers often say something like “no more than 1/8 inch variation over 6 to 10 feet.” In practice, that means:
- You run a long straightedge or level across the floor and mark dips and humps.
- You sand or grind high spots.
- You fill low spots with a stable leveling compound that is right for your subfloor type.
On wood subfloors, also look for squeaks and loose spots. Screw those down before installing hardwood. If you ignore them, that noise will telegraph through your new floor, and you cannot fix it later without removing planks.
Choosing the right installation method
The method you use affects feel, noise, and how the floor ages.
Common options:
- Nail or staple down on wood subfloors
- Glue down on concrete or for some engineered floors
- Floating installation where boards lock together and float over an underlayment
Nail or staple down
This is often used for solid hardwood over plywood or OSB. It feels solid underfoot and is time tested.
Keep in mind:
- You need the right nailer or stapler and the right fastener spacing.
- You still might use a rosin or felt paper underlayment to reduce squeaks.
- You do not nail through every tongue if the manufacturer gives different spacing, but do not stretch that spacing to save time.
Glue down
This is common for engineered hardwood over slabs.
Points to watch:
- Use the adhesive type the manufacturer recommends. Do not guess or use leftovers from another project.
- Spread adhesive evenly and follow the trowel pattern on the bucket.
- Watch for adhesive in the joints. Clean as you go; dried glue on the surface is annoying to remove.
Floating floors
Some engineered products click together and float. These are friendly for DIY in many cases but need a very flat subfloor.
You also use an underlayment that might include sound control or vapor protection. Read the flooring instructions carefully. Skipping the correct underlayment can void warranties and shorten the floor’s life.
Layout and expansion gaps
This is probably where hardwood starts to feel like a puzzle. It is not just “start at a wall and go.”
Board direction and room shape
There are typical guidelines, like running boards parallel to the longest wall, or perpendicular to joists. Those are fine, but not absolute rules.
Ask:
- Which direction makes the room feel less chopped up?
- How will the boards look from the entry?
- Do you have long hallways that should keep a consistent direction?
In many Denver homes with open living and kitchen areas, you choose a direction that makes the two spaces feel linked. That often means running boards the long way across both zones.
Expansion gaps
Wood will move over the year. You need to leave gaps around walls, door frames, and fixed objects so the floor has room to expand.
Typical practice:
- Leave around 1/4 inch at walls and vertical surfaces, or what the manufacturer calls for.
- Cover those gaps later with baseboard and shoe molding, or a similar trim.
- Plan for transitions where a long stretch of flooring might need extra expansion breaks.
If you skip these gaps or stuff boards tight to the wall, you risk buckling when the wood swells. In a dry market like Denver, people sometimes think, “It only shrinks here.” That is not always true. We do get humid spells, especially in certain seasons, and your HVAC habits matter.
Finishes that work well in Denver homes
You can buy hardwood that is prefinished or you can install raw wood and finish it on site.
Prefinished vs site finished
Each has trade offs.
| Type | Pros | Challenges |
|---|---|---|
| Prefinished |
Factory applied finish, often very durable No sanding dust in your home Faster install, fewer on-site steps |
Small beveled edges between planks Less custom color and sheen control Harder to repair isolated damage perfectly |
| Site finished |
Smooth, flat surface with minimal bevels Custom stain and sheen selection Blends well in large, open spaces |
More labor, dust, and odor during finishing Room access blocked longer Skill sensitive sanding and coating steps |
In Denver, both types perform well if installed correctly. Humidity swings affect the wood itself more than the finish choice, although some finishes flex with the wood better.
Sheen and color choices
Shinier is not always better. High gloss can look sharp but shows scratches, dust, and movement more clearly. Many homeowners here lean toward satin or matte finishes. Those hide small imperfections better and feel more relaxed in bright, sunny rooms.
Color also reacts to Denver light. Our sunlight is strong, and it can shift tones over time.
Things to think about:
- Very dark floors show dust and pet hair faster.
- Very light floors can show wear paths if the finish is too thin.
- Mid tones and natural looks are forgiving and long lasting.
- UV protection in finishes can slow color change but not stop it.
You can spend hours on stain samples. That is not wasted time. Put sample boards in the room, look at them morning and evening, and then decide.
Installation tips that matter more in Denver
Now to the practical, on the ground tips that often separate an OK job from a strong one.
Control the indoor environment
Try to keep your home within a reasonable temperature and humidity band not just during installation, but afterward.
Rough targets many installers use:
- Temperature around normal living conditions, not extreme highs or lows.
- Relative humidity in a moderate range, not desert dry.
In winter, a humidifier on your HVAC can help. In summer, when storms roll through and humidity bumps up, air conditioning and ventilation help moderate that.
No one keeps conditions perfect all year. You just want to avoid wild swings that stress the wood.
Take your time on the first rows
The first two or three rows set your line. If they are off, every board after multiplies that mistake.
Practical steps:
- Snap a chalk line as a reference for your first row.
- Dry lay a few boards to see how they land along the wall and transitions.
- Check for straightness every few rows and correct minor drift early.
Rushed first rows often mean having to rip very narrow pieces at the far wall, which can look awkward and be less stable.
Mix boards from different boxes
Do not install one box at a time from start to finish. Color and grain can vary slightly from box to box.
Open several boxes and pull from all of them as you go. That spreads variation across the floor so you do not end up with a block of darker boards in one corner.
Plan around vents and tricky cuts
Every home has those little areas that slow you down: floor vents, doorways, closets.
Instead of leaving those for later and hoping they work out, plan them in your layout:
- Mark vent locations and decide whether to use flush mount vents or surface mount covers.
- Think through how boards will run through each doorway.
- Use templates or cardboard patterns for tough cuts.
It sounds trivial, but vents in the wrong place can break the look of the floor.
When to call a pro in Denver
I know a lot of people want to DIY their hardwood. It can be done. At the same time, some situations are risky for a first timer:
- Large, open main floors where mistakes are highly visible
- Basements or concrete slabs with moisture concerns
- Complex patterns like herringbone or chevron
- Projects that require serious subfloor leveling
If you are facing one of these, talking to a local installer who knows Denver hardwood installation can save you money and stress over time, even if you still want to help with prep or demo.
DIY hardwood is less about “Can I swing a hammer?” and more about “Can I manage moisture, layout, and finishes with enough precision that the floor still looks good in ten years?”
On the other side, here are spots where DIY often works better:
- Smaller bedrooms or offices with simple layouts
- Floating engineered floors with good manufacturer support
- Projects where you already have decent carpentry experience
You can also mix approaches. Maybe you remove old flooring and handle baseboards while a pro handles the actual plank installation and sanding.
Thinking ahead to refinishing and long term care
Even the best hardwood floors in Denver will need some care over time. Planning for this now gives you more options later.
How often will you refinish?
The answer depends on:
- How hard you are on the floor: pets, kids, shoes indoors, furniture dragging
- Finish type and thickness
- Color and sheen choice
Solid hardwood with a thick wear layer can handle several full sand and refinish cycles. Many engineered products with a good wear layer can handle at least one or two light sanding or screen and coat services.
If you know you are rough on floors, picking a product with more refinish potential makes sense. If you are more gentle, you might be OK with a slightly thinner wear layer.
Everyday care in a dry place
Denver’s dust can be unforgiving. Simple habits help:
- Use mats at entry doors to catch grit.
- Sweep or vacuum gently on a regular schedule.
- Clean with a cleaner that matches your finish type. Avoid heavy water use.
Also, small felt pads under furniture legs help protect the surface. It is a detail, but those little scrape marks add up faster than you expect.
Realistic expectations: what is “stunning” vs perfect
Hardwood is not a printed vinyl plank. You will see character, small gaps at times, little variations in color and grain. That is part of why people choose it.
In Denver, a floor that looks great will still move a little between January and July. You might notice hairline gaps in the driest weeks that tighten back up later. That is normal, not a failure.
For many homeowners, “stunning” hardwood does not mean flawless like glass. It means:
- Good layout and consistent direction across rooms
- Color and sheen that match the home and light
- Boards that feel solid underfoot, without major squeaks
- No big cupping, crowning, or weird height changes
If you expect zero movement or no small imperfections ever, hardwood might frustrate you. If you can accept it as a living surface that ages, you will likely be happier in the long run.
Common Denver hardwood installation questions
How long does a typical hardwood installation take?
For an average sized Denver home area, say 500 to 800 square feet, actual installation might take two to four days once prep is done. But that does not include acclimation, subfloor work, or site finishing. If you add those in, the whole project can stretch across a week or more. Bigger or more complex layouts take longer.
Is hardwood a bad idea if I have pets?
Not necessarily, but you need to be realistic. Dogs with long nails will scratch the finish. Larger breeds can leave dents on softer species. If you have pets, pick a tougher species, a more forgiving finish sheen, and accept that the floor will show some life. Many people think that lived-in look is fine, as long as the floor holds up structurally.
Can I install hardwood over radiant floor heat in Denver?
You can, but you need to choose products meant for radiant systems and follow the heating guidelines very carefully. Usually the installer will bring the slab or subfloor up to temperature slowly and keep the system within certain limits. Rapid temperature swings are the enemy here. Engineered hardwood is often recommended over solid for radiant setups.
What if I already see small gaps after my floor goes in?
Check the time of year and your indoor humidity. In winter, small gaps can appear as the wood dries. As your home humidity rises later, many of those gaps shrink. Large, consistent gaps or cupping, though, can point to moisture mismatches or installation problems, and those might need a professional opinion.
Is it worth paying more for better underlayment?
If you live in a multi level home or have kids and pets, better underlayment can help with sound and comfort. For floating floors over concrete, a good underlayment with vapor control is almost non negotiable. On wood subfloors with nail down floors, underlayment is more about noise and feel than moisture, but still useful.
If you look at your current project plan, where do you feel least sure: product choice, subfloor condition, or the actual installation steps?