So, you are trying to figure out how to upgrade your bathroom floors and where a company like Spartan Plumbing fits into that. The short answer is that you handle the flooring choices and design, and a plumbing company steps in to protect that new floor from leaks, moisture problems, and hidden damage before and after installation.
Most people jump straight to tile samples and Pinterest boards when they plan a bathroom floor. I get it, that part is fun. But bathroom floors live in the harshest room in the house. Water, humidity, hot showers, cleaning chemicals, kids splashing everywhere. If the plumbing under and around that floor is not solid, even the nicest tile or luxury vinyl can fail faster than you expect. That is where a qualified company like Spartan Plumbing becomes part of the flooring plan, not just an emergency number you call when something breaks.
Here are some key points before we dig into the details.
- Your floor choice has to match your bathroom’s moisture and traffic levels, not just the style you like.
- Subfloor health and drainage matter more than the visible flooring layer.
- A plumber should check supply lines, drains, and the toilet flange before you install a new floor.
- Small leaks under tile or vinyl can destroy your subfloor without obvious surface damage.
- Good planning between your flooring contractor and your plumber will save money and frustration.
- Floor height changes can affect toilets, shower thresholds, doors, and trim.
- Good ventilation and water control are as important as the flooring material itself.
Why plumbing and flooring are tied together
Most people think of flooring as a surface problem: “My tiles are cracked” or “This vinyl looks worn” or “The grout is disgusting.” But in many bathrooms, surface issues are just symptoms.
Under that floor, you often have:
- Water lines feeding the sink, toilet, and shower
- Drain lines taking out used water
- A toilet flange bolted to the floor and connected to the sewer line
- A subfloor made of plywood or OSB that hates constant moisture
If any of this plumbing is old, loose, or installed poorly, you can spend thousands on a beautiful new floor and still end up with:
- Soft spots that spread under tile or vinyl
- Mildew and odor you cannot quite locate
- Grout lines that keep cracking in the same area
- Planks that start cupping or lifting near the shower or toilet
If you only focus on what you see above the floor and ignore what is below it, you are taking a risk with every dollar you spend on flooring.
I have seen bathrooms where the tile looked almost new, but the subfloor under the toilet was so rotted that you could push a screwdriver straight through. There were no big puddles, just a slow leak around the wax ring over several years. A quick plumbing check years earlier would have saved a full tear out.
Choosing flooring materials that actually fit your bathroom
Let me go through the most common bathroom floor options and how they relate to plumbing, water, and long term wear. It is not just about looks. It is about how forgiving each material is when something in the plumbing is less than perfect.
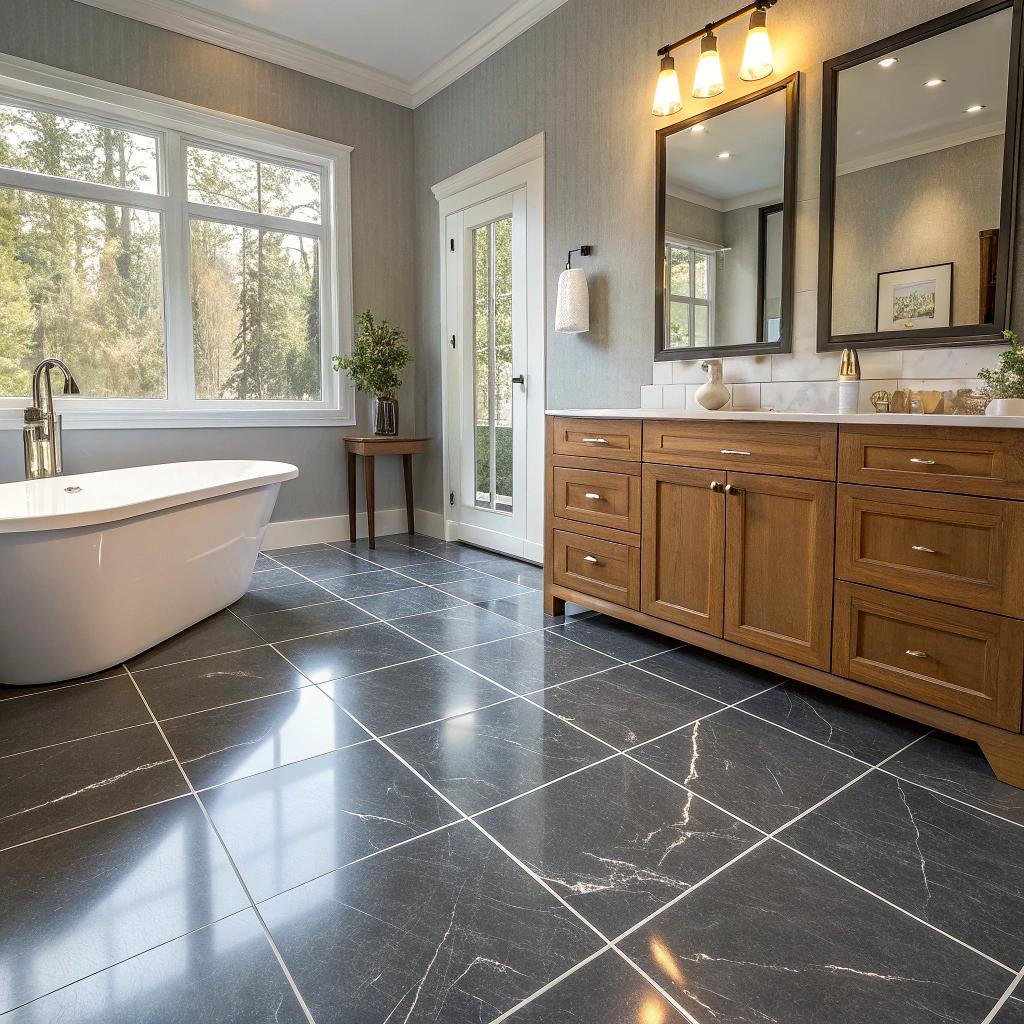
Tile (porcelain or ceramic)
Tile is still the most common bathroom floor. It is tough, handles water, and looks clean.
Pros:
- Handles repeated splashes and wet feet very well
- Good with radiant floor heat if that is in your plan
- Wide range of sizes, finishes, and colors
Cons:
- Grout can stain and crack if movement or moisture is present
- Cold on bare feet without heating
- Hard surface, so dropped items break easily
From a plumbing angle, tile is pretty unforgiving. If there is a leak under or around the toilet, shower curb, or tub, tile will not always show it right away. The subfloor can slowly fail underneath.
If you choose tile, the preparation under it matters as much as the tile itself: proper waterproofing, strong subfloor, and tight plumbing fixtures.
Tile pairs very well with a solid plumbing inspection because you want to know that everything below the surface is sound before you lock it under mortar.
Luxury vinyl plank (LVP) or tile (LVT)
Many homeowners like vinyl that looks like wood or stone. It is warmer and softer than tile, and modern versions usually handle water pretty well.
Pros:
- Comfortable underfoot and not as cold as tile
- Easier to install and repair than full tile
- The better products are water resistant and stable
Cons:
- Cheaper products can warp with standing water
- Water that gets underneath planks can sit there without drying fast
- Sunlight or harsh cleaners can fade or dull the surface
Here plumbing plays a quieter but real role. A tiny leak under a vanity, around a tub, or at a toilet supply line can creep under the planks and stay hidden. You may just notice a musty smell, or a soft step near the wall.
A quick look at all connections before floor installation, and new shutoff valves where needed, can keep that from becoming a hidden swamp under your “waterproof” floor.
Natural stone (marble, slate, travertine, etc.)
Stone floors feel like an upgrade. They also need more care than many people think.
Pros:
- Very long lasting when installed correctly
- High-end look that fits luxury renovations
- Can work well with heated floors
Cons:
- Porous and needs sealing
- More expensive material and labor
- Can be slippery or show etching from cleaners
Any leak with stone can cause stains, mineral deposits, or even loosening over time. If a shower valve or body jet is hidden in the wall and leaks behind stone tile, you may not catch it quickly. That is one reason many remodelers involve a plumber at the rough-in and again before walls and floors are closed up.
Sheet vinyl or glue-down vinyl
This option is not as trendy, but it still has a place, especially for budget projects or rentals.
Pros:
- Lower cost material and quicker install
- Few seams, which helps with splash zones
- Softer and more forgiving if the subfloor is not perfect
Cons:
- Can tear, dent, or discolor more easily
- Does not have the same resale impact as tile or quality LVP
- Moisture from below can bubble the surface
Here again, if plumbing is leaking into or from the subfloor, that will often show as bubbles or dark areas. In some ways, that is good because you see a sign faster. In other ways, it means your “new” floor looks old sooner.
How to plan a bathroom floor upgrade with plumbing in mind
So how do you blend your flooring project with smart plumbing decisions, without making it more confusing? The basic order of decisions helps.
Step 1: Figure out how your bathroom is really used
Ask yourself a few honest questions:
- Is this a full bathroom with a shower or tub, or a half bath with just a toilet and sink?
- Do kids use this bathroom and splash a lot?
- Do you have someone older in the home who needs a floor that is less slippery?
- Do you deal with long, hot showers that leave the room humid for a long time?
A rarely used guest bath might handle almost any quality flooring, while a busy family bath near bedrooms needs better water and slip resistance.
The messiest person in the house sets the standard your bathroom floor has to meet, not the neatest one.
Step 2: Inspect what you already have
Before you order new flooring, look closely at the current space:
- Is there soft or spongy flooring near the toilet, tub, or shower?
- Do you see stains on the ceiling below the bathroom?
- Is there a constant musty smell that does not go away?
- Have you had to re-caulk around the tub or shower many times?
If you answer “yes” to some of these, there is a fair chance that plumbing or waterproofing has been an issue already. That is not something new flooring will fix by itself.
This is usually the point where a quick visit from a plumber makes sense. They can check:
- Toilet flange condition and height
- Supply line connections and shutoff valves
- Drain connections under the sink and tub
- Visible parts of the shower valve and drain from access panels, if available
Sometimes the news is boring, which is actually good. Other times, you learn that there is a slow leak that has been hiding for months.
Step 3: Decide on floor height and how it affects plumbing
Many people do not think about floor thickness until it is too late. But changing height matters more than it first seems.
For example:
- Switching from thin sheet vinyl to thick tile can raise the floor by half an inch or more.
- Going from tile to click-together vinyl can lower the floor.
That change can affect:
- Toilet flange height and how well the wax ring seals
- The step into a shower or tub
- Door clearance and trim
If the flange ends up too low compared to the new floor, people often stack wax rings or use quick fixes. That can work for a while. It can also fail and leak slowly around the base of the toilet.
Having a plumber set the flange height correctly at the right point in your project avoids that habit of “adding more wax until it seems fine.”
Where a plumbing company like Spartan Plumbing actually helps your floor last
Let me walk through the specific plumbing touchpoints that affect a bathroom floor upgrade. This is where a team like Spartan Plumbing is not just responding to emergencies, but helping protect your new finish.
1. Toilet removal, flange repair, and reset
Any real bathroom floor upgrade almost always involves pulling the toilet. I would be wary of any installer who says they will cut around it. That looks bad and leaves old flooring trapped under the base.
A plumber can:
- Shut off water, disconnect, and remove the toilet safely
- Inspect the flange for cracks, rust, or rot in the surrounding subfloor
- Raise or lower the flange to match the new flooring height
- Install a new closet bolt set and wax or waxless seal
- Reset the toilet on the finished floor with a proper connection
If your subfloor is damaged, a plumber and flooring contractor might work together. The plumber secures the flange to new wood, and then the floor installer finishes around it. It is not complicated, but it needs to be done in the right order.
2. Shower and tub areas
Showers and tubs are where most of the water in the room actually lands, apart from the toilet. A plumbing company like Spartan can help with:
- Checking or replacing the shower drain assembly before the new floor and pan go in
- Confirming slope to drain is correct for tiled shower floors
- Testing for leaks at the drain and the shower valve before tile or waterproofing layers are closed up
If you are upgrading a standard tub to a tiled shower with a low curb, that is a bigger plumbing and flooring crossover. You want to be certain about waterproofing at the curb, inside corners, and where the shower floor meets the bathroom floor.
Most of the hidden damage in bathroom floors starts near the shower edge or toilet base, not in the middle of the room.
3. Sink, vanity, and supply lines
This part feels small, but a dripping P-trap or loose supply connection under the sink can quietly ruin base cabinets and the floor.
During a floor upgrade, the plumber can:
- Replace old flexible supply lines with new ones
- Swap weak shutoff valves for new quarter-turn valves
- Check traps and drain pipes for proper slope and tight seals
This is not glamorous work, but it is cheaper to do while the room is already torn apart, rather than two years later after you notice the cabinet floor is swollen.
4. Moisture control and ventilation support
Plumbers do not usually install bath fans, but they do see the results when a bathroom does not handle humidity well. Constant moisture in the air can lead to:
- Grout lines that never quite dry
- Mildew forming around baseboards and corners
- Wood door frames swelling and rubbing
If you mention ongoing moisture issues, an honest plumber will often tell you when the bathroom has a ventilation problem or when a shower door or curtain is not keeping water in. A floor that sees constant standing water at the entry is going to have a shorter life.
Comparing flooring choices with plumbing risk in mind
Here is a simple table that connects common flooring materials with how they handle plumbing issues. It is not perfect, but it helps frame the discussion.
| Floor type | Handles small splashes | Handles hidden leaks | Typical plumbing concerns |
|---|---|---|---|
| Porcelain / ceramic tile | Very good | Fair, can hide problems | Subfloor rot near toilet or shower, grout cracking from movement |
| Luxury vinyl plank / tile | Good to very good | Fair, water can sit under planks | Hidden moisture under floor, edge swelling if water sits |
| Natural stone | Very good | Fair, can stain or etch | Leaks cause staining, mineral deposits, subfloor issues |
| Sheet vinyl | Good | Poor to fair | Leaks cause bubbles, discoloration, subfloor damage |
| Laminate (not vinyl) | Poor | Poor | Swelling and edge damage from any leaks or repeated splashes |
If you are redoing a bathroom floor without touching any fixtures, I personally think that is a slight red flag. Not because you must redo plumbing every time, but because you at least want to look at it and confirm it is sound.
Coordinating your flooring contractor and plumber
One thing that often goes wrong in bathroom projects is timing. Floors get installed at the wrong point in the process, or toilets are pulled and reset by people who do not work with plumbing every day.
Here is a simple sequence that tends to work well:
1. Planning and inspection
- You decide on a flooring material and get basic measurements.
- A plumber checks existing fixtures, subfloor around the toilet, and visible drains for any signs of leaks.
- Any needed repairs that require access from below or inside walls are handled first.
2. Demolition
- Old flooring is removed, and the plumbing is exposed around fixtures.
- The toilet is removed and the flange inspected properly.
- Any damaged sections of subfloor are cut out and replaced.
At this stage, plumbers and flooring installers sometimes need to talk briefly about flange placement and any new shower or tub drain locations.
3. Rough plumbing adjustments
- Flange height is set to match the planned floor thickness.
- Shower or tub drains are adjusted if the footprint is changing.
- Old or corroded supplies and valves are replaced, especially if they were already weeping.
This is usually a short visit compared to a full bathroom remodel, but it is key.
4. Floor installation
- New subfloor, underlayment, or backer board is installed.
- Tile, stone, vinyl, or other flooring is laid, grouted, or glued as needed.
- Waterproofing at the shower transition and other wet areas is completed.
The toilet is normally not set yet, to avoid working around it and to prevent accidental damage.
5. Final plumbing hookup
- The toilet is reset on the new floor with a correct seal.
- Sinks, tubs, and showers are connected and tested.
- Visible joints and connections are checked for leaks under normal use.
This flow keeps each trade working in a clean, logical order. It also lowers the chance that someone rushes a flange repair or uses a questionable workaround.
Signs your bathroom floor problem is really a plumbing problem
Sometimes people start out wanting a “flooring upgrade” but actually need a repair first. Here are some signs that the floor itself is not the only issue.
Softness or movement near fixtures
If the floor moves or feels soft near:
- The front or sides of the toilet
- The corner of the tub or shower
- The wall under the sink
then you likely have water damage below. That usually started with plumbing or waterproofing, not just age.
Persistent odor that survives cleaning
If the room smells musty or like sewage even after cleaning:
- The toilet wax ring may be leaking.
- The shower trap might be dry or poorly vented.
- A small leak under the floor might be feeding mold.
New flooring without plumbing checks will not fix that smell for long.
Cracked grout or recurring caulk failures
Grout that cracks in the same lines or caulk that keeps separating might be telling you that:
- The floor is moving due to rot or inadequate structure.
- The shower pan is not properly supported.
- Water is consistently reaching areas that are not meant to stay wet.
You can repair grout many times, but until the underlying reason is handled, it will tend to come back.
Protecting your new bathroom floor for the long term
Once you spend the time and money to upgrade your bathroom floor, you probably do not want to repeat it for many years. A little basic plumbing awareness goes a long way.
Here are a few practical habits:
- Look around the toilet base a few times a month for moisture or staining.
- Check under the sink for drips or damp wood, not just during spring cleaning.
- Watch for slow drains in the tub or shower; standing water spreads moisture over more of the floor.
- Keep caulk in good shape where the tub or shower meets the floor and walls.
- Use bathmats that dry quickly rather than ones that stay soaked for hours.
None of this is dramatic. You do not need fancy tools. You just need to pay a little attention.
Common questions about plumbing and bathroom floor upgrades
Can I upgrade my bathroom floors without touching the plumbing at all?
You can, but it is often risky. At minimum, the toilet should be removed and reset properly, and visible plumbing checked for leaks. Skipping that to save a little time can lead to bigger problems later. I would say it is a bit like painting over peeling paint without scraping. It might look fine at first, but you have not really fixed the reason it was failing.
Is tile always the best choice for bathroom floors?
Not always. Tile is strong and water friendly, but it is hard, cold, and less forgiving if the subfloor has any movement. A busy family might prefer a quality LVP floor that is warmer and easier on bare feet. A higher end remodel might justify stone with more maintenance. I do not think there is a single “best” choice. There is only the best match for your use, budget, and how much maintenance you are willing to handle.
Do I really need a plumber just to reset a toilet after the floor is done?
Plenty of people reset toilets themselves. Some do fine. Some crack flanges, misalign wax rings, or overtighten bolts and fracture the toilet base. If you are careful, patient, and do some homework, you can learn it. If this is your main bathroom and you do not want to risk hidden leaks, hiring a plumber for that part is not a bad idea. I think of it as cheap insurance for an area that can cause ugly damage when it goes wrong.
How do I know if I should replace the subfloor during a flooring upgrade?
Once the old flooring is up, you or your contractor should:
- Press firmly around the toilet flange and any wet-area transitions.
- Look for dark stains, flaking, or crumbling wood.
- Check from below if the ceiling is open or accessible.
If the wood feels soft, breaks apart, or has clear mold growth, it should be replaced instead of just covered up. Covering bad subfloor under new tile, vinyl, or stone usually ends with cracks, movement, and more repair cost later.
Is it worth doing a bathroom floor upgrade if I am not changing the layout?
Yes, often it is. You can keep the same layout and still:
- Improve waterproofing at the shower threshold
- Fix subfloor damage that has been slowly growing
- Upgrade shutoff valves and supply lines
- Choose a safer, less slippery floor surface
The key is to treat the project as more than just “new tile” or “new vinyl.” If you give a little attention to the plumbing and structure underneath, you get a sturdier result.
When is a full bathroom remodel better than just a floor upgrade?
If you already have:
- Old galvanized plumbing that is causing pressure or rust issues
- Frequent clogs, backups, or sewer line problems
- Repeating leaks from the shower area or walls
then doing just the floor can feel like patching a car that really needs an engine. In those cases, wrapping the flooring work into a bigger remodel that also handles plumbing upgrades might be smarter, even if it costs more upfront. It comes down to how long you plan to stay in the home and how many signs of deeper problems you are already seeing.
If you think honestly about how you use the bathroom, what the plumbing is doing behind the walls and under the floor, and how your flooring choice will respond to that, then your upgrade has a much better chance of lasting.