So, you want to know if recycled glass tiles can really give you beauty from waste, without turning into a maintenance nightmare or a design regret six months later. Yes, recycled glass tiles can look amazing, perform well, and reduce waste, as long as you choose the right type, prep the surface correctly, and install them with the right setting materials.
The short version: recycled glass tiles are strong, moisture resistant, and color-stable, but they need proper installation, flexible thinset, and good surface prep. They are not a plug-and-play swap for ceramic; they have their own quirks.
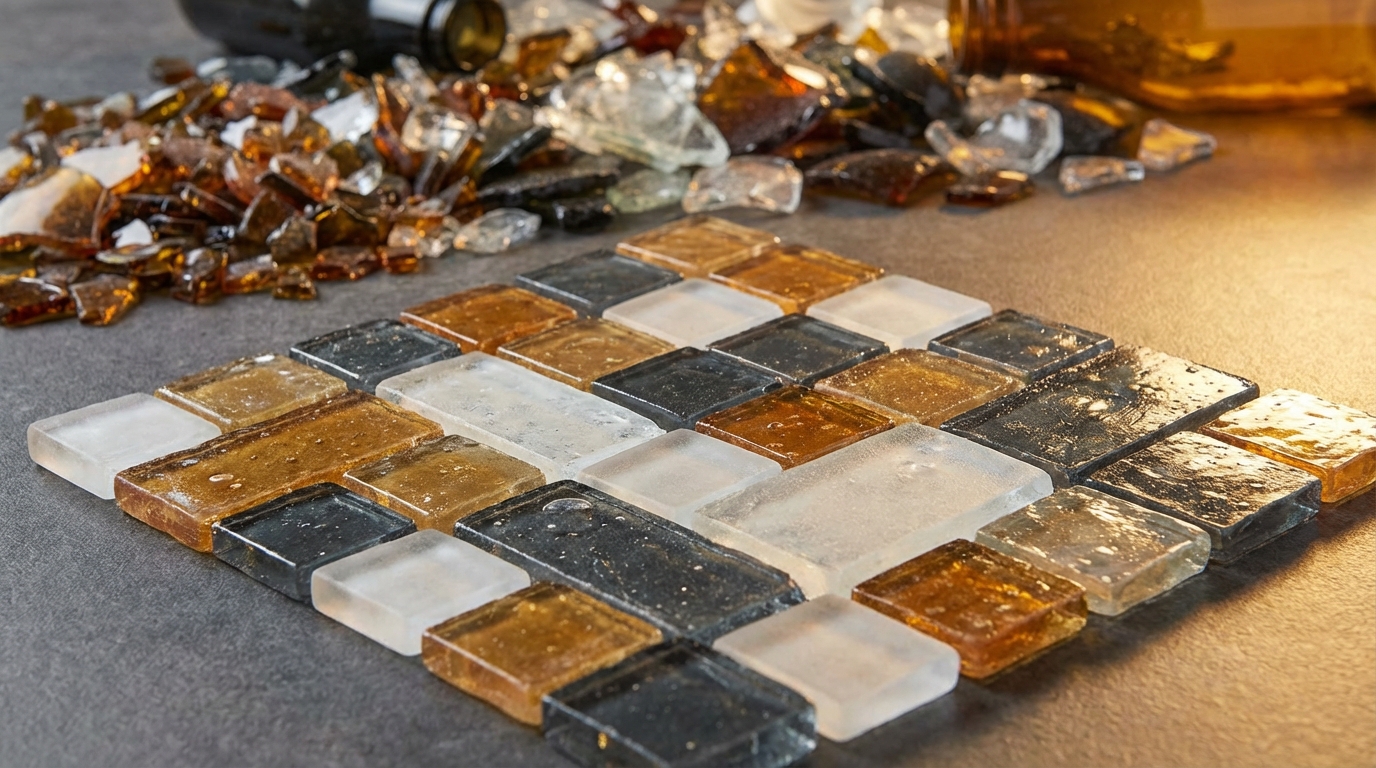
Here is the context. Glass is non‑porous, it does not absorb water, and it keeps color for decades. Recycled glass tiles take post‑consumer or post‑industrial glass (bottles, windows, manufacturing scrap), crush it, melt it, and form it into tiles. You get style and waste reduction in one product. The catch is that glass expands and contracts more than ceramic, can be slippery when wet if you pick the wrong finish, and will highlight every flaw on the wall behind it.
Things you need to know:
- Recycled glass tiles are usually made from 30-100% recycled content.
- They reflect light, so color and grout choices matter more than with ceramic.
- Surface prep and the right thinset are critical; glass is less forgiving.
- They work great in showers, pools, backsplashes, and feature walls.
- They can chip at the edges if cut with the wrong tool or handled roughly.
- They are easy to clean but need the right grout and sealer around them.
- Slipperiness depends on finish and tile size, not just material.
- They often cost more per square foot but can be used in small feature areas.
Recycled glass tiles are one of the few products where design impact and waste reduction genuinely line up if you pay attention to details.
What are recycled glass tiles, exactly?
Recycled glass tiles start with discarded glass. That might be:
- Post‑consumer bottles and jars
- Old window glass
- Leftover glass from manufacturing
Manufacturers sort it, clean it, crush it, and then either melt it or bind it with resins or cement‑like materials to form tiles.
There are three main types you will run into:
1. Fully melted glass tiles
These look like classic glass: smooth, translucent or opaque, often glossy.
Process in plain language:
- Glass is crushed into cullet (small pieces).
- Melted at high temperature in a furnace.
- Poured into molds, rolled into sheets, or pressed into shapes.
- Cooled, cut to size, sometimes back‑painted.
You see these a lot in:
- Mosaic sheets for backsplashes and showers
- Pool waterlines
- Accent strips mixed with stone or ceramic
2. Sintered or fused glass tiles
In some lines, the glass is not fully melted into a clear liquid. Instead, it is heated until the particles fuse together under pressure.
Result:
- A denser, sometimes more matte tile
- More texture and less mirror‑like shine
- Often higher recycled content by weight
3. Glass‑aggregate tiles (glass plus binder)
You also see products where glass chips or granules are mixed into:
- Concrete‑like binders
- Resins
These can look like terrazzo or stone with colorful glass pieces spread through the body.
They can be:
- Large format floor tiles
- Countertops or slabs
- Wall panels
The label “recycled glass tile” covers a spread of products. Always read how it is made, not just the marketing tag on the box.
How much recycled content is real?
You want beauty from waste, not beauty from greenwashing.
Most serious manufacturers list both:
- Pre‑consumer recycled content (factory scrap), and
- Post‑consumer recycled content (bottles, windows, etc.).
Typical ranges:
| Tile Type | Post‑Consumer Content | Total Recycled Content |
|---|---|---|
| Standard glass mosaic | 30-60% | 40-70% |
| High recycled content lines | 70-100% | Near 100% |
| Glass‑aggregate concrete tiles | 20-50% | 30-60% |
If a product claims big environmental benefits but gives no numbers, treat that as a red flag. Ask:
- “What is the percentage of post‑consumer recycled glass by weight?”
- “Is there any third‑party verification?”
Where recycled glass tiles work best
Some spaces are perfect for glass. Some are not.
1. Kitchen backsplashes
This is the most common use and for good reason.
Pros:
- Non‑porous surface; splashes wipe off easily.
- Color holds up against UV from windows.
- Reflects light, which brightens tight kitchens.
Watch for:
- Grease behind the stove; pick a finish that cleans easily.
- Grout color; darker grout makes cleaning lines more obvious.
A simple example: a 1 x 3 inch recycled glass subway in a soft sea‑glass green over white quartz. With under‑cabinet lights, that wall will bounce light around the room.
2. Showers and bathroom walls
Glass is naturally water friendly. It does not absorb water, so mold and stains cling to grout, not the tile.
Good uses:
- Feature strip at eye level
- Full shower walls with small mosaics
- Shower niche or shampoo shelf front
Corner detail matters. You want low‑iron, well‑cut tiles and a good layout so edges do not chip.
3. Pools and water features
Recycled glass mosaics are common in pools, fountains, and spas.
Why:
- Dense and non‑porous, with low absorption
- Color depth under water is stronger than most ceramics
- Stand up to freeze‑thaw cycles if rated for exterior use
Here you must follow the exact mortar and grout recommendations from the manufacturer. Pools are unforgiving if you cut corners.
4. Feature walls and fireplaces
Recycled glass mosaics used in small areas can give a strong focal point without blowing the budget.
Examples:
- A vertical strip of glass behind a freestanding tub
- A fireplace surround with textured glass mosaics
- A lobby or entry accent wall in commercial spaces
When you move glass tiles to a large wall, lighting design becomes as important as the tile choice itself.
5. Floors: where to use and where to skip
Can recycled glass go on floors? Yes, but with conditions.
Good candidates:
- Bathroom floors with small mosaics (lots of grout joints increase traction).
- Shower floors with textured or matte glass.
- Residential powder rooms that do not get outdoor grit tracked in.
Risky:
- High‑traffic commercial entries with glossy large tiles.
- Outdoor walkways in icy climates if surface is too smooth.
If slip resistance concerns you, look for:
- COF (Coefficient of Friction) ratings
- Textured or frosted finishes
- Smaller mosaics with many grout lines
Design choices: color, finish, and layout
Here is where projects either look high‑end or a bit off.
Translucent vs opaque glass
Translucent tiles:
- Let light pass through.
- Show the thinset color behind them.
- Great for bright, luminous walls.
Opaque tiles:
- Have a colored body or back‑painted backing.
- Hide the adhesive layer.
- Safer if you are worried about seeing trowel lines.
If you pick translucent glass, you need a very flat, uniform substrate and a consistent white thinset. Any patchwork or ridges can show as shadows.
Glossy, matte, frosted, or textured
Finish affects both look and function.
- Glossy: Strong reflections, sharp color. Good for walls. Can be slippery on floors.
- Matte: Softer light, more forgiving of smudges, better for floors.
- Frosted: Hides fingerprints a bit, gives a soft glow.
- Textured: Adds grip and scatter of light, hides water spots.
You can also mix finishes:
- Glossy field tiles with a matte border
- Random blend sheets that mix frosted and clear pieces
Size and pattern
Common shapes:
- 1 x 1, 1 x 2, 1 x 3 mosaics on mesh
- Hexagons and penny rounds
- Subway tiles (2 x 4, 3 x 6, 2 x 8)
- Large rectangles for feature walls
Mosaics:
- Conform to curves and slopes (shower pans, niches).
- Help with slip resistance on floors.
- Are easier to install around outlets and windows.
Larger tiles:
- Fewer grout joints to clean.
- Highlight alignment issues more.
- Need a very flat wall or floor.
Patterns to consider:
- Classic brick / running bond
- Stacked for a cleaner look
- Herringbone in narrow spaces
Do a dry layout on a table before you commit. With glass, the pattern will either feel intentional or obviously off; there is rarely a middle ground.
Installation: why you cannot treat glass like ceramic
Recycled glass tiles have different physical behavior from ceramic or porcelain. If you ignore that, you get cracked tiles, visible ridges, or bond failure.
Surface preparation
Glass shows everything.
You want:
- Flat, smooth substrate (cement board, properly primed drywall for non‑wet areas, or mortar bed).
- No major dips or humps. Aim for no more than 1/8 inch variation over 10 feet for walls, tighter if possible.
- Clean, dust‑free surface with no oil or loose material.
If you are tiling over old tile, confirm with both manufacturers. Many glass tile makers want direct bond to a cementitious surface.
Adhesive choice (thinset)
Glass expands and contracts more with temperature changes. It also does not absorb water, so standard thinset that counts on absorption into the tile body is not ideal.
Look for:
- A white, polymer‑modified thinset rated for glass tile.
- Product that meets or exceeds ANSI A118.4 or A118.15, and where the manufacturer explicitly lists glass tiles.
Why white? With translucent or light tiles, gray thinset can dull or change colors.
Trowel technique
Trowel marks show through translucent tiles.
Key steps:
- Use the notch size the tile manufacturer recommends.
- Comb all ridges in one direction.
- Then flatten the ridges with the flat side of the trowel to create a smooth, consistent bed.
Press tiles in with a slight sliding motion to avoid trapped air. For mosaics on mesh, sometimes a beating block or grout float helps press them evenly.
Movement joints
Because glass moves more, movement joints are non‑negotiable.
High‑level rules:
- Soft joints at changes in plane (wall to ceiling, wall to wall inside corners).
- Perimeter gaps on floors, filled with flexible sealant instead of grout.
- Expansion joints on larger fields per tile industry standards (for example, every 20-25 feet inside, more often in sun‑exposed areas).
Skipping these can cause tiles to crack even if everything looks fine at first.
Cutting recycled glass tiles
Cutting is where a lot of chipping and frustration comes from.
Better methods:
- Use a high‑quality wet saw with a blade rated for glass tiles.
- Score slowly, do not force the cut.
- Use painter’s tape over the cut line for delicate pieces if you still see chipping.
For tiny adjustments, some pros use glass tile nippers rated for this material, but they test on scrap first.
Plan cuts so the most visible edges are factory edges. Hide cut edges in corners, under trim, or at the bottom where they meet the countertop.
Grout and joint choices
Grout changes the whole look of glass and affects maintenance.
Grout color
Glass amplifies grout color more than ceramic.
Simple guidance:
- For a unified, soft look: match grout to the average tile color.
- For more definition: go one or two shades darker than the tile.
- For high contrast, like white tile with dark grout: use only if you want the grid to stand out.
With blends of colors in one sheet, pick a neutral that sits between the lightest and darkest tones.
Grout type
Common options:
- Cementitious grout: Simple, cost‑effective, but can stain. Good sealer around stains helps.
- High‑performance cement grout: Better stain resistance and color consistency.
- Epoxy grout: Strong, very stain resistant, color stable. Good for kitchens, showers, and pools. Higher price and trickier to install.
Some glass manufacturers call for epoxy grout for submerged applications or heavy‑use showers. Always read their manual; glass warranties are strict.
Joint size
Standard mosaics often have 1/16 to 1/8 inch joints. With recycled glass, small variations in size are normal.
For larger tiles:
- Most lines require at least 1/16 inch; often 1/8 inch for floor tiles.
- Do not butt‑joint glass tiles; they need some space for movement and grout.
Cleaning, care, and durability
One of the main benefits of recycled glass tile is low maintenance.
Day‑to‑day cleaning
For routine care:
- Use a mild detergent and soft cloth or sponge.
- Avoid abrasive pads that can scratch finishes.
- Rinse and wipe dry in showers to cut hard water spots.
What to avoid:
- Strong acids on grout and metal trim.
- Razor blades on textured finishes.
Stains and etching
Glass tile itself does not stain or etch like stone. Stains usually affect grout or surface residue.
Tricks:
- For soap scum: a mix of white vinegar and water, tested in a small spot, can help on many surfaces.
- For grease on backsplashes: dish soap with warm water breaks it down.
If you use epoxy grout, you get much stronger resistance to kitchen splashes, coffee, or colored sauces.
Scratch resistance and chipping
Glass hardness sits near 5-6 on the Mohs scale. It is quite hard but brittle at edges.
Real‑world meaning:
- Forks or rings brushing a backsplash will rarely scratch.
- Sharp impacts on exposed edges can chip.
- Dragging heavy metal furniture over glass flooring is risky.
On floors, smaller mosaics spread force and rely more on grout, which can help.
Environmental story: what impact are you actually making?
Recycled glass tiles take glass that would otherwise go to landfill or low‑grade fill and give it long‑term use.
Points that matter:
- Glass is infinitely recyclable at the material level.
- Using cullet in glass production can cut energy use compared to making glass from raw sand and soda ash.
- Some factories use electric or cleaner‑fuel furnaces and more local sourcing.
But there are trade‑offs:
- Melting glass needs high heat and energy.
- Shipping heavy boxes of tile over long distances has a carbon cost.
If this side matters for your project, ask suppliers:
- “Where is the tile manufactured?”
- “What percentage of the glass is post‑consumer?”
- “Are there any Environmental Product Declarations or similar documents?”
The more local the production and the higher the post‑consumer content, the stronger your waste‑reduction story becomes.
Cost: where recycled glass fits your budget
Recycled glass tiles tend to cost more than standard ceramic but less than some high‑end stone or artisan tile.
Typical ranges (very general):
| Material | Approx. Material Cost per sq. ft. (USD) |
|---|---|
| Basic ceramic tile | $1.50-$5 |
| Mid‑grade porcelain | $3-$8 |
| Recycled glass mosaics | $8-$25 |
| High‑design glass blends | $20-$50+ |
Install cost can also be higher because:
- Installers work more slowly with glass.
- They need sharper blades and careful handling.
- Layout and surface prep often take longer.
One practical way to manage budget is to use recycled glass as an accent:
- A band in a shower rather than full height.
- One feature wall with surrounding ceramic.
- Backsplash only, with standard tiles on other walls.
Common mistakes with recycled glass tiles
These are the issues I see again and again.
- Using gray thinset behind translucent tiles. This dulls color and can show trowel lines. Always test with a spare tile and white mortar.
- Skipping movement joints. This often leads to cracks at corners or in the middle of walls that get sun exposure.
- Inconsistent substrate color. Patching with different materials or colors behind translucent glass can lead to ghost patterns.
- Wrong blade for cutting. Regular tile blades chip glass; use a proper glass blade.
- Choosing polished glass on busy floors. Looks great in photos; less great when someone slips.
When recycled glass tiles are a strong choice
You are likely a good fit if:
- You care about reducing waste and want that reflected in the project materials.
- You want visual depth and light reflection that ceramic does not provide.
- You are willing to invest in careful installation and not just the cheapest possible labor.
- You like clean, modern lines or bright feature areas.
You might want to rethink if:
- Your budget is very tight across large square footage.
- You need heavy‑duty flooring for high‑impact industrial spaces.
- You plan to DIY without reading and following the tile manufacturer’s guide.
How to evaluate a recycled glass tile before buying
Before you commit to hundreds of square feet, do a small test.
Steps:
- Order at least three samples of the tiles you like.
- Stick them to a temporary board with the recommended mortar and grout type.
- View that board in morning, midday, and evening light.
- Try cleaning off dried toothpaste, cooking oil, or soap scum.
Ask yourself:
- Does the color feel right with your cabinet, countertop, and floor?
- Does gloss level feel distracting or just bright?
- Do you see trowel marks behind it? If yes, surface prep or mortar technique needs work.
A single test board over one weekend can save you from years of living with a tile that does not look like you pictured from the catalog.
Simple example layouts that work well
If you are not sure where to start, here are a few patterns that tend to age well.
1. Soft neutral backsplash with recycled glass mosaics
- Tile: 1 x 2 inch recycled glass mosaic in a blend of warm grays and soft whites.
- Grout: Light gray, close to the average tile color.
- Countertop: White quartz or light stone.
- Cabinets: White or light wood.
This gives a subtle shimmer without shouting.
2. Shower feature band in cool tones
- Field tile: Large white porcelain on the main walls.
- Accent: 4-6 inch wide vertical band of recycled glass mosaics in blue‑green tones.
- Floor: Small hex mosaics in a matte finish for grip.
The glass accent lets you use less glass square footage while still making a strong impression.
3. Small bathroom floor with glass‑aggregate tiles
- Tile: 12 x 12 or 24 x 24 tile with recycled glass chips in a concrete‑like body.
- Finish: Matte or light texture.
- Grout: Close to body color for a monolithic look.
You get the environmental story and visual interest, with the footing of a more classic floor material.
One practical tip to act on now
Before you pick a recycled glass tile, grab your phone, stand in the room, and take photos at different times of day from the exact angles you will see the wall or floor. Then, when you get samples, tape them in place and take the same photos again.
Compare them side by side. While you do that, pay attention not just to color, but to reflections, glare, and how much the grout lines stand out. That quick test, done before you order, will tell you if your “beauty from waste” idea will actually feel right when you live with it every day.