So, you are trying to level a concrete floor using self-leveling compound and you want to know how to do it the right way.
You do it by cleaning and priming the slab, sealing every gap, mixing the compound to the right consistency, and pouring it fast in one continuous pass.
You are working against two things: gravity and time. Gravity helps you; time does not. Self-leveling compound starts to set very fast, so your prep work matters more than your trowel skills. If the surface is dirty, porous, or full of gaps, the compound will not flow right, it will crack, or it will just sink where you did not expect it to.
Here are the key things you need to know before you even open a bag:
- You must measure high and low spots first, not guess.
- Every crack, hole, and gap needs to be filled or sealed.
- Primer is not optional for almost all products.
- You have 10-20 minutes of working time for most mixes.
- Water ratio and mixing time matter more than “feel”.
- Pour in one direction and keep a wet edge.
- Ventilation and temperature affect how the compound cures.
- You still need flatness, not just “level” on a bubble.
Let me walk you through this like I would explain it to a friend who is about to install new flooring over a wavy concrete slab.
—
Understanding what self-leveling compound really does
Self-leveling compound sounds magical. You pour it, it spreads, and everything is perfect. At least that is the marketing.
In reality, it is more like a very thin, fast-setting concrete topping that flows better than normal concrete. It wants to find its own shape, but it does not fix bad prep work, and it does not climb hills.
> Self-leveling compound will follow gravity. If there is a low spot, it will run to it.
> If there is a hole or gap, it will disappear into it.
So your job is to create a controlled space where gravity works for you, not against you.
What self-leveling compound is made of
Most self-leveling products are cement-based with very fine aggregate and polymers that help it flow and bond. That sounds technical, but what it means for you is:
- It sticks to concrete better than standard mortar.
- It can be poured very thin (often from 1/8 inch to 1 inch, sometimes more with aggregate).
- It sets much faster than a regular concrete mix.
You will see two broad categories:
- Standard self-leveling underlayments
For leveling interior slabs under tile, vinyl, laminate, etc. - High-strength or wear-surface compounds
Designed to be the final walking surface or for heavier load.
For most home projects where you are putting flooring on top, you are likely using a standard underlayment.
When self-leveling compound is a good idea
Use it when:
- You have dips or waves that are too big for patching with thinset alone.
- Your floor is flat in some areas but noticeably low in others.
- You want a smoother base for large format tile or click vinyl.
Skip it or rethink it when:
- Your slab is actively moving or cracking from structural issues.
- You have serious moisture problems or hydrostatic pressure.
- You need to raise the entire floor several inches (different approach).
> Self-leveling is a finish step for a stable slab, not a band-aid for structural movement.
—
Step 1: Assessing your concrete floor correctly
So, you want to level your concrete floor, but first you need to know where your problem actually is.
The direct answer: map the floor with a long straightedge and a level, not with your eyes.
Tools for checking flatness
Here is what works well:
- 6-10 foot straightedge (aluminum level or a long, straight board).
- 2-4 foot bubble level or laser level.
- Marker or chalk to mark high and low areas.
- Tape measure.
Lay the straightedge on the floor and move it around like a giant squeegee. Look for gaps under it and spots where it rocks.
> Many flooring installers look for no more than about 1/8 inch variation over 6-10 feet for things like vinyl plank.
> For tile, industry standards often allow about 1/4 inch over 10 feet, but flatter is better.
Where you see gaps under the straightedge, those are low spots. Where it rocks, the middle is high.
Decide on your target elevation
Before you think about how much compound to buy, you need a reference level.
You can:
- Use a laser level and draw a reference line on the walls.
- Or use a long level and transfer marks across the room.
From that line, measure down to various points on the slab and write the numbers directly on the concrete.
Now you know:
- Where the highest point is (this is usually your reference).
- How low the worst spot is.
- Roughly how deep the self-leveler needs to be in each area.
If your lowest point is, for example, 3/4 inch below your highest point, and the product allows a minimum of 1/8 inch thickness, you may end up with:
- 1/8 inch near the high areas.
- Up to 7/8 inch in the deepest area.
Now we are talking about real numbers, not guesswork.
—
Step 2: Choosing the right self-leveling compound
So, you are standing in front of a shelf full of bags and wondering which one is right.
The direct answer: pick a product that matches your thickness needs, substrate type, and whether it is underlayment or wear-surface.
Key product variables
When you read the bag or technical data sheet, look for:
- Minimum and maximum thickness per pour
Example: “From 1/8 inch to 1 inch neat, up to 5 inches with aggregate.” - Substrate
Some bond to concrete only. Some can go over primed tile or old adhesive (with conditions). - Interior vs exterior
- Drying / walk-on time
Example: “Walkable in 2-4 hours, floor covering in 16-24 hours.” - Compressive strength
Often in the 3,000-5,000 psi range or more.
> Do not mix products from different brands or types on the same pour.
> Stick to one system, including the matching primer.
Self-leveler vs patching compounds
You might also see “patch and skim” products next to self-levelers. They are different:
| Feature | Self-leveling compound | Patch / skim coat |
|---|---|---|
| Consistency | Very flowable, pours like thick pancake batter | Paste-like, trowel-applied |
| Coverage area | Larger areas, rooms | Spot repairs, small sections |
| Depth | Typical 1/8″ to 1″+ | Usually thin, feather-edge to 1/2″ |
| Main purpose | Correct wide dips and waves | Fill cracks, little birdbaths, transitions |
If your floor has one or two dips the size of a dinner plate, a patch product may be enough. If the entire room is wavy, you want self-leveling compound.
—
Step 3: Prepping the concrete floor
So, you are ready to pour, but your floor is dusty and has old glue on it.
You cannot pour directly on that and expect it to last.
The direct answer: you must clean, abrade if needed, repair major cracks, and then prime.
Surface cleaning and profiling
Start with:
- Vacuum or sweep thoroughly.
- Scrape off anything loose: paint, thinset, adhesive ridges.
- Remove oil or grease with a degreaser that rinses clean.
> Self-leveling compound bonds to the concrete, not the dust on the concrete.
If your slab has smooth, shiny, or “burned” surfaces, some products recommend mechanical profiling:
- Light grinding with a concrete grinder.
- Shot blasting, in more serious cases (common in commercial work).
For a typical home project, a rented floor grinder with a diamond head can give you enough tooth for bonding, especially if the slab is very smooth.
Handling cracks and joints
Not every crack is a disaster, but you cannot ignore them.
- Static hairline cracks
Often can be opened slightly with a grinder and filled with patch material compatible with the self-leveler. - Wide cracks or movement joints
Fill to support the self-leveler, but honor movement joints through the topping if movement is ongoing.
If you have control joints (the cut lines in concrete):
- They can usually be filled and covered if the slab is stable and interior.
- Read the product sheet; some systems call for keeping those joints in some form.
Any gaps at walls, along stairs, or through-door thresholds must be sealed.
> Self-leveler is like water with cement in it. If there is a path out, it will find it.
Use foam backer rod or weatherstripping foam, plus caulk or fast-setting patch, to close all those escape routes.
Dealing with moisture
Moisture is a big one. Some compounds tolerate higher moisture levels, others do not.
You can do a simple test:
- Tape down a square of plastic (about 2 ft x 2 ft) tightly around the edges.
- Leave it 24-48 hours.
- If you see heavy condensation or dark damp patches, you have moisture coming through.
This is not a lab-grade test, but it gives you a rough idea. For serious cases, flooring installers use calcium chloride or RH tests.
If you see real moisture issues, you may need:
- A moisture mitigation primer or epoxy system.
- To address drainage or vapor issues before any leveling or floor covering.
Ignoring this can lead to delamination later.
—
Step 4: Priming the surface
So, you cleaned the slab and fixed cracks. Now you are wondering if you can skip primer.
You should not skip it.
The direct answer: primer improves bond and controls how fast the concrete absorbs water from the self-leveler.
Why primer matters so much
Concrete is porous. It acts like a sponge.
If you pour self-leveling compound onto unprimed concrete:
- The concrete pulls water out of the mix too fast.
- The surface can dry unevenly and craze or powder.
- Bond strength drops.
Primer:
- Seals the pores so the water stays in the mix longer.
- Helps the compound wet the surface and stick better.
- Can improve flow across the slab.
> Manufacturers test their product with their primer.
> When you skip primer, you are running your own experiment on your house.
How to apply primer for self-leveling compound
Process is usually simple:
- Mix the primer with water if the instructions say so.
- Pour a small amount and spread with a soft push broom or roller.
- Aim for a thin, even film with no puddles.
Let it dry to the state the bag calls for:
- Some want it tacky.
- Some want it fully dry and translucent.
If your slab is very porous, you may need a second coat. The surface should not absorb water instantly if it is primed right.
—
Step 5: Planning the pour
So, you have your floor prepped and primed, and you are about to start mixing.
Do not mix yet.
The direct answer: plan your pour path, staging area, and help before you add water.
Estimate volume and staging
First, estimate how many bags you need. Self-leveler bags list coverage like:
- “50 sq ft at 1/8 inch thickness” per 50 lb bag.
If your average depth works out to 1/4 inch over 100 sq ft:
- 1/8 inch coverage: 50 sq ft.
- For 1/4 inch, that is half the coverage: 25 sq ft per bag.
- 100 sq ft / 25 sq ft per bag = 4 bags.
Add a buffer bag or two; it is better to have extra in reserve than to run short mid-pour.
Then, think about:
- Where to place mixing buckets.
- How you will carry mixed material into the room.
- Ventilation and where dust will go when mixing.
Have enough people and tools
For small rooms, one person can do it, but it is more comfortable to have at least two:
- One mixing continuously.
- One pouring and spreading.
You will need:
- Heavy-duty mixing drill (1/2 inch, low RPM) with a paddle designed for cement.
- 2-3 mixing buckets (so you can rotate).
- Measuring bucket or pitcher for water, marked at the right volume.
- Gauge rake or smoothing trowel / spreader.
- Spiked roller (very helpful for popping bubbles and evening the surface).
- Spiked shoes if you need to walk on the wet material.
> Most self-levelers give around 10-20 minutes of working time at normal room temperature.
> That clock starts the second powder touches water.
So your goal is a steady, continuous flow, not one bucket every 10 minutes.
—
Step 6: Mixing self-leveling compound the right way
So, you are ready to add water into a bucket and go by feel.
That usually leads to poor results.
The direct answer: measure water exactly, add powder to water, and mix for the full time the bag states.
Water ratio is not negotiable
Every product gives a water range, for example:
- “4.5 to 5.0 quarts of water per 50 lb bag.”
Stay within that, and do not stretch it because you want it “runnier”. If you add too much water:
- The mix can segregate (sand sinking, cement rising).
- Strength drops.
- Cracking or weak edges are more likely.
So:
- Use a measuring container.
- Fill with the exact water for one bag.
- Pour water into the bucket first.
- Slowly add powder while mixing.
Mixing time and rest period
Typical mixing pattern looks like:
- Mix 2-3 minutes at the recommended speed.
- Let the mix rest for a short time (if the instructions say so).
- Briefly remix and then pour.
> Do not hand mix with a stick. You will not get a uniform blend, and you will trap dry pockets.
If you are mixing multiple bags in one bucket, confirm that the drill can handle it and that you follow the instructions for multi-bag batches.
—
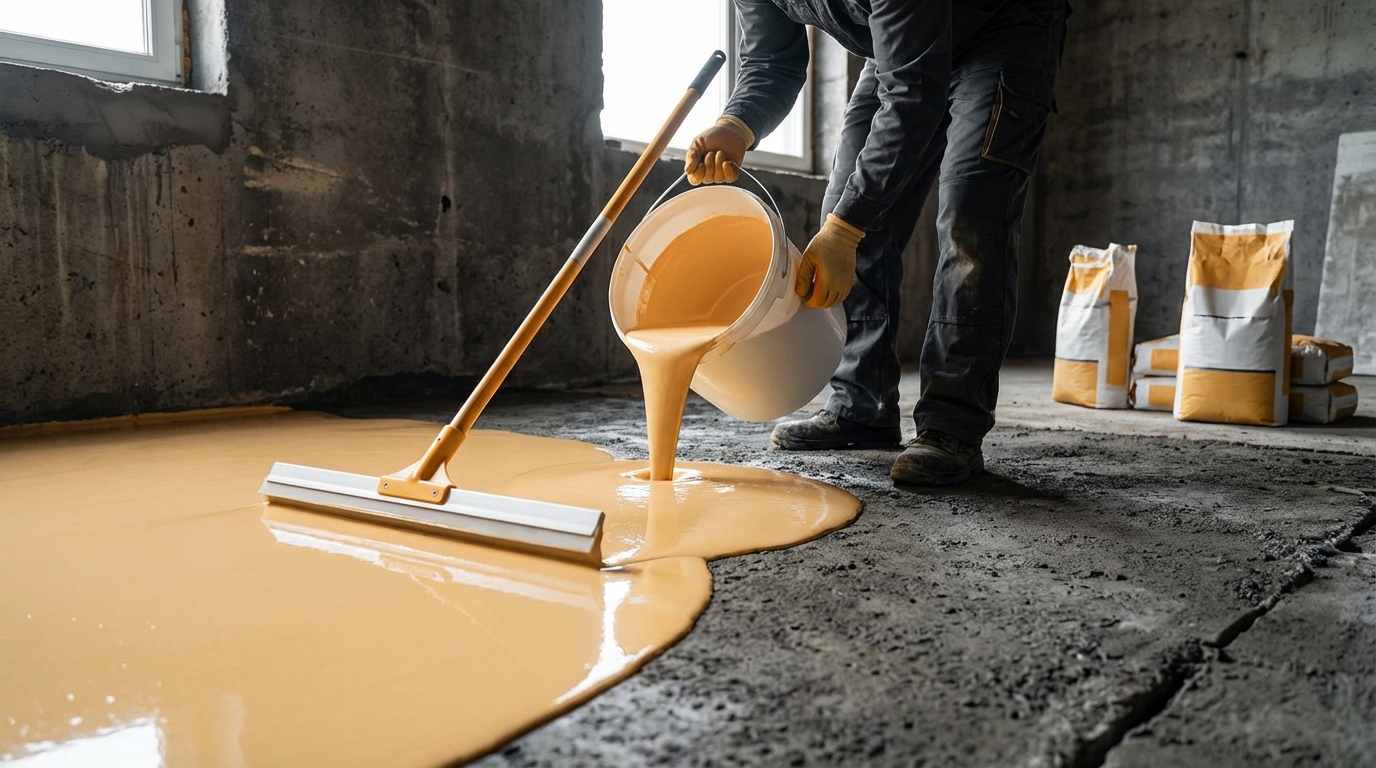
Step 7: Pouring and spreading the self-leveling compound
So, the compound is mixed and you are standing in the doorway, bucket in hand, wondering where to start.
Start from the lowest point or the farthest point, depending on access, and keep the material wet and continuous.
Where to start the pour
You want two things:
- To avoid getting trapped in a corner.
- To let the compound flow toward low areas, not away from them.
Often, you start at the farthest corner away from your exit and work back toward the door. If the main low spot is near a wall, you may start near that area, then feather out.
Pour the first bucket in a loose “S” or “puddle” pattern. Do not dump everything in one huge pile only in one spot.
Spreading vs forcing
Self-leveling compound needs help to move, but not aggressive troweling like mortar.
Use a gauge rake or smoother to:
- Pull the material across the floor and cover bare spots.
- Gently encourage it into corners and along walls.
- Blend the edge from one bucket to the next while both are still wet.
> Think of it like guiding syrup, not like sculpting clay.
If you have a spiked roller, run it gently over the surface shortly after pouring. This can:
- Break up air bubbles.
- Help reduce minor ridges from raking.
- Even out the surface.
Wear spiked shoes if you need to walk on the material; normal shoes will leave deep footprints.
Keeping a wet edge
Your buckets should follow each other quickly. While one is being spread, another is being mixed.
Do not wait until the surface skins over before adding more. Instead, pour the next batch into the edge of the still-wet area, not onto hardened material.
If you stop too long and then restart:
- You will get cold joints or visible ridges.
- Flatness will suffer.
This is why planning and help matter so much.
—
Step 8: Curing, drying, and checking the result
So, everything looks good when it is wet and shiny.
The next part is letting it cure correctly and then verifying flatness.
Do not rush the drying
Keep these in mind:
- Avoid strong drafts directly across the fresh surface for the first few hours.
- Protect it from foot traffic until the product says it is walkable.
- Keep temperature and humidity in the recommended range.
Most interior products say you can:
- Walk on it after 2-4 hours.
- Install flooring after 16-24 hours (some sooner, some later).
These times are based on lab conditions, so give it some margin. Thicker areas may need more time.
Checking flatness after the pour
Once it is fully hard enough to walk, bring out your straightedge again.
Lay it across the floor in multiple directions:
- Note any small ridges or trowel lines.
- Look for new dips that are deeper than your floor covering tolerance.
Minor high spots can often be:
- Lightly sanded or ground smooth.
Small shallow spots may be filled with patch compound in thin layers.
> The goal is consistent flatness over the whole area, not perfect bubble-level readings at every point.
Flooring manuals usually care more about variation over a span than about absolute “level.” For example, large format tiles like a very flat surface, or you will see lippage between tiles.
—
Common mistakes and how to avoid them
So, you want to avoid the problems that cause people to redo their floors.
Here are frequent mistakes and what to do differently.
1. Skipping primer
Problem:
- Bond failure, chalky surface, poor flow.
Fix:
- Always use the manufacturers primer, applied as directed.
2. Adding too much water
Problem:
- Weak, powdery topping.
- Micro cracking, softness at the surface.
Fix:
- Measure water, do not go above the listed maximum.
3. Not sealing gaps
Problem:
- Material runs under walls, into adjacent rooms, or disappears into holes.
Fix:
- Foam and caulk all edges and penetrations before you pour.
4. Working too slow
Problem:
- Cold joints, visible lines where one batch started to set before the next arrived.
Fix:
- Have help mixing and pouring.
- Stage all tools and materials before starting.
5. Pouring over unstable or dirty surfaces
Problem:
- Delamination months later, hollow spots.
Fix:
- Remove loose material, contaminants, and anything that can move or flake.
6. Ignoring moisture
Problem:
- Bubbles, blistering, failure of adhesive or flooring on top.
Fix:
- Test for moisture and follow the limits on the product sheet.
- Use moisture control systems when the readings are too high.
—
Safety and comfort while working
So, you are focused on the floor and not thinking about yourself.
Cement products are not friendly to skin or lungs.
Basic safety steps
Use:
- Dust mask or respirator when mixing dry powder.
- Safety glasses.
- Gloves that handle wet cement.
- Knee pads if you will be kneeling a lot.
Work in a ventilated area, but do not create a strong draft over the fresh pour.
Clean tools with water before the compound sets. Once it is hard, you are basically chipping concrete off your paddle.
—
Using self-leveling compound under different floor coverings
So, you want to level for tile, vinyl, or laminate, and you wonder if the rules change.
The basics stay the same, but tolerances differ.
Under tile
Large format tile (say 12 x 24 inches or larger) needs a very flat surface.
If the floor has dips, your thinset will vary in thickness, and tiles will not line up well.
Self-leveler gives you a much smoother base, then:
- Use the right thinset mortar over the cured self-leveler.
- Follow the primers or scarifying recommendations if the mortar needs extra grip.
Under vinyl plank or sheet vinyl
Vinyl telegraphs imperfections. Small ridges or dips can show through.
Here, you aim for:
- Very smooth surface with no sharp transitions.
- Feathered edges using a patch compound at transitions.
Some vinyl adhesives have moisture and alkalinity limits. The self-leveler does not eliminate that; you still test and follow those limits.
Under laminate or engineered wood
Click-together floors benefit from a flat subfloor because:
- Joints are less stressed.
- Boards feel more solid underfoot.
Self-leveler plus an underlayment pad can create a solid, consistent base. Just be sure:
- No loose dusty film is left; vacuum before the underlayment goes down.
—
When one pour is not enough
So, you poured, and the floor is better but still not where you want it.
You can often add a second layer, with the right prep.
Pouring over self-leveling compound
Manufacturers usually allow pouring over their own cured compound. You may need to:
- Lightly sand or grind any glossy, smooth spots.
- Vacuum dust thoroughly.
- Apply primer again, this time on the cured self-leveler.
Then repeat the process with a thinner topping layer to correct remaining dips.
> Read the bag or technical sheet. Some products specify how long you should wait between layers.
This staged approach can work better than trying to fix a very uneven slab in one deep, risky pour.
—
Practical tip: do a small “test room” before tackling big spaces
If this is your first time, choose a small area like a closet or a small hallway and treat it like a full project:
- Prep, prime, mix, and pour just like you will in the main room.
- Pay attention to mixing time, flow, and working time.
- Check flatness the next day and note what you would change.
That single dry run will teach you more than reading ten product sheets, and it will make your main pour go much smoother.