So, you are trying to figure out flooring for gyms that actually handles impact and stays hygienic without turning into a bacteria farm. The short answer: go with quality rubber or vulcanized rubber tiles/rolls in impact zones, dense foam only where needed, and plan strict cleaning routines with the right chemicals and drainage.
You want flooring that protects joints and equipment, stays safe when people sweat all over it, and does not trap smells or germs. That comes down to two things: impact absorption (how the floor deals with force) and hygiene (how it deals with sweat, dirt, and microbes). Most gym owners over-focus on thickness and under-focus on density, porosity, and cleaning design.
Things you need to know:
- Impact absorption is about density, thickness, and material structure, not just “softness.”
- Poor flooring can increase injury risk and damage equipment over time.
- Porous flooring traps sweat, odor, and bacteria; non-porous or sealed surfaces are easier to keep clean.
- Different zones in a gym need different flooring types and specs.
- Cleaning routines, drainage, and air flow matter as much as flooring material.
- Cheap flooring often costs more over 3 to 5 years because of replacements, damage, and smell problems.
- Good installation and subfloor prep are key for both safety and hygiene.
Why gym flooring is not just “something soft underfoot”
Most people shop gym flooring like they shop for a yoga mat: they press it with a finger and go, “This feels soft, must be good.”
That is not how impact works.
When a barbell hits the floor from shoulder height, the impact force can be several times the weight of the bar. When someone lands from a box jump, the load through their joints can be 3 to 6 times their body weight. That energy has to go somewhere.
If the floor is too hard, your joints and the equipment take the hit.
If the floor is too soft, you lose stability, and heavy equipment can sink, shift, or wobble.
> Good gym flooring is a controlled compromise between absorption and stability. Not a trampoline. Not concrete.
Now add hygiene.
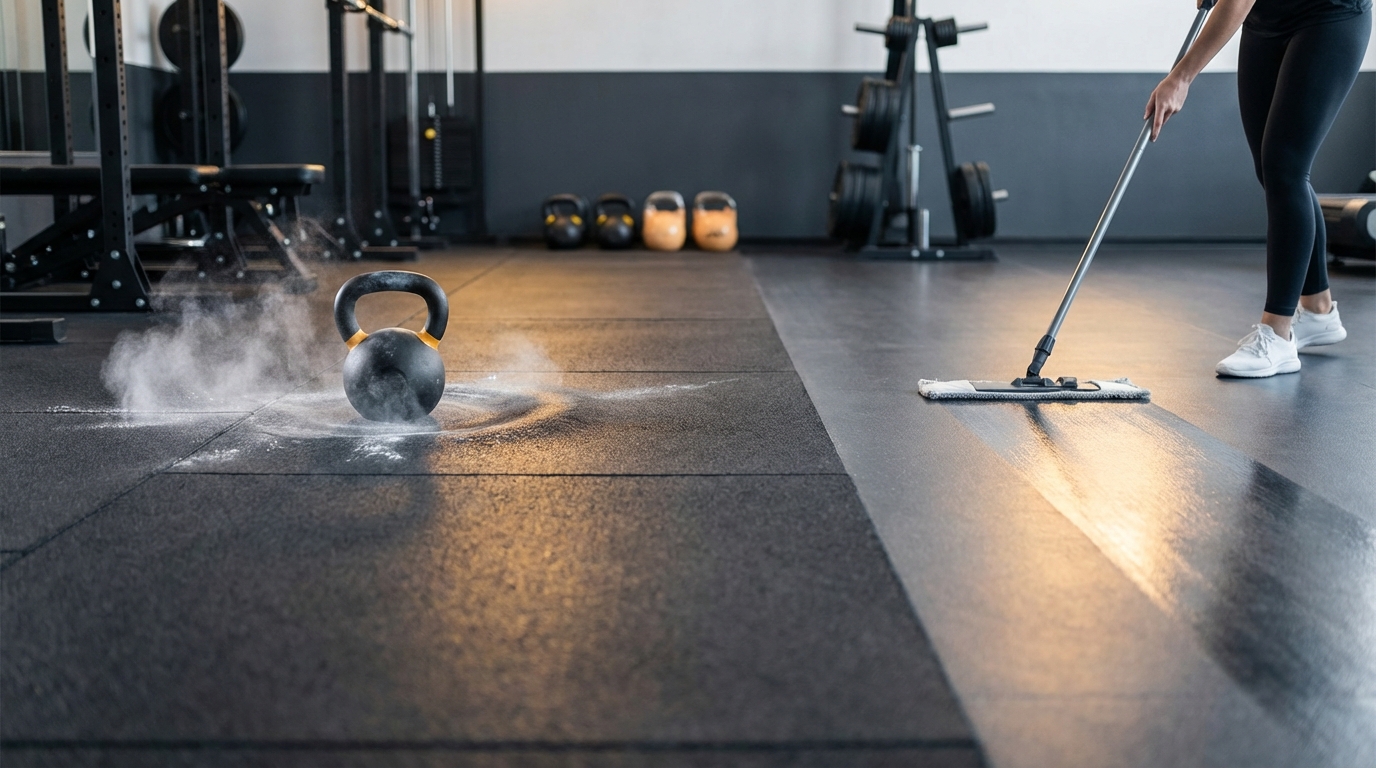
Every training day people drip sweat, skin cells, maybe blood, chalk dust, and dirt onto that floor. If the surface absorbs and holds onto that moisture, bacteria and mold have a warm home. Smells show up first. Then infections and complaints.
> If your floor smells bad by mid-day, you have a hygiene design problem, not just a “we should mop more” problem.
So when you think about flooring, you have to think:
- How much force will it take?
- How often will it get wet or sweaty?
- How easy is it to clean daily and deep clean weekly or monthly?
Impact absorption: what is actually happening when something hits the floor
Impact is energy that has to go somewhere
When a dumbbell drops or a person lands from a jump, you have kinetic energy hitting the surface. That energy can:
- Transfer into the body (joints, spine, ligaments).
- Transfer into the equipment (barbell, dumbbell, machine frame).
- Transfer into the building (subfloor, concrete, neighbors downstairs).
- Be absorbed and spread out by the flooring.
What you want is flooring that:
- Absorbs and spreads enough force to reduce peak loads.
- Still stays firm enough for stability during lifting, sprinting, and lateral moves.
- Protects your subfloor and nearby spaces from vibration and impact noise.
> The goal is not “maximum softness.” The goal is “controlled deceleration” of every impact.
Key properties that affect impact absorption
When you compare flooring for gyms, you want to look at more than color and thickness.
Here are the main factors:
- Material type (rubber, EVA foam, PVC, wood, turf with underlayment).
- Density (kg/m³ or similar; higher density means firmer but still can absorb impact).
- Thickness (mm or inches; thicker is not always better if density is low).
- Structure (solid, air pockets, tiles with feet, underlay layers).
A simple way to think about it:
- Thick + low density: soft, squishy, good for bodyweight work, bad under heavy loads.
- Medium thickness + high density: firm but forgiving, good for lifting and machines.
- Layered system: top layer for grip and hygiene, bottom layer for impact absorption.
Common gym flooring materials and how they behave
Let us walk through the usual suspects.
| Material | Impact Absorption | Stability | Typical Use |
|---|---|---|---|
| Vulcanized rubber tiles | High, predictable | High | Weightlifting, HIIT, main floors |
| Recycled crumb rubber (loose bound) | Good, depends on density | Medium to high | Functional zones, general rooms |
| EVA foam tiles | Soft, high shock absorption | Low under heavy loads | Kids, martial arts, light fitness |
| Plywood + rubber top | Moderate | Very high | Olympic lifting platforms |
| PVC sports flooring | Moderate | High | Group exercise, courts |
| Turf + foam underlay | Moderate to high | Medium | Sleds, agility, conditioning |
A few practical points:
- For heavy barbells and dumbbells, rubber is your friend.
- For Olympic lifting, you often want a platform with a stiff center and rubber edges.
- For agility and sprint work, turf can work well if the underlay is not too soft.
- For yoga or stretching, softer foam or mats are fine because loads are low.
How thick should gym flooring be?
This is where a lot of people guess.
You might see common numbers like:
- 8 mm rubber rolls.
- 10 mm rubber tiles.
- 15 mm tiles for free weights.
- 20 to 40 mm tiles for heavy lifting / CrossFit style areas.
But thickness alone is misleading. An 8 mm tile with very high density can protect better and feel more stable than a 20 mm tile made from low density foam.
> If you only compare thickness, you will almost always overspend or under-protect.
As a rough guideline:
- Cardio areas (treadmills, bikes, rowers): 6 to 10 mm high density rubber or PVC. Main jobs: vibration control, grip, noise reduction.
- Selectorized machines and racks: 10 to 15 mm dense rubber. You want stability plus some impact absorption from plates touching down.
- Heavy free weight and drop zones: 15 to 30 mm dense rubber tiles, or a platform system with at least 20 mm around drop zones.
- Functional / HIIT zones: 10 to 20 mm rubber or rubber + foam, depending on how much jumping and equipment dropping happens.
If you have neighbors under your gym or a sensitive subfloor, you might layer:
- Top: 10 to 15 mm rubber.
- Underlay: impact pad (20+ mm), or a sprung subfloor design.
Hygiene: sweating, shedding, and how flooring holds or releases it
Now let us talk about the less pleasant side: sweat, microbes, and smell.
Daily training creates a mix of:
- Sweat and skin oils.
- Dead skin cells.
- Chalk dust.
- Outdoor dirt from shoes.
- Occasional blood or body fluid spills.
If that mixture seeps into the floor and stays there, it becomes a growth medium for bacteria and fungi.
> If your gym smells like a locker room even after cleaning, that is not “normal gym smell.” It is a sign that surfaces are absorbing and holding organic material.
Porous vs non-porous flooring
This is one of the most important distinctions for hygiene.
- Porous flooring has tiny open spaces where liquids can seep in.
- Non-porous flooring has a sealed surface so liquids stay on top.
For gym floors, that translates roughly to:
- More porous: recycled crumb rubber tiles with rough surfaces, open-cell foam, unsealed concrete, some cheap EVA tiles.
- Less porous / non-porous: vulcanized rubber, PVC sports floors, sealed concrete, epoxy, tiles, some coated turfs.
Porous floors:
- Absorb sweat and spills into the surface.
- Can trap odors inside the material.
- Are harder to fully disinfect because cleaners do not reach deep layers.
Less porous floors:
- Keep liquids on the surface for easier cleaning.
- Allow more effective disinfecting.
- Are better for spaces that see high sweat volume or bare skin contact.
That does not mean you must avoid porous rubber entirely. High quality rubber with controlled porosity can still work well, especially if you:
- Follow structured cleaning routines.
- Avoid letting sweat or water pool.
- Have good air circulation and humidity control.
Microbes on gym floors: what you are really dealing with
You are not just fighting dirt. You are fighting living organisms.
Research on gyms often finds:
- Staphylococcus (including MRSA in some cases) on surfaces and mats.
- Fungi like dermatophytes that cause athlete’s foot and ringworm.
- Gram-negative bacteria from skin, sweat, and environment.
These organisms like:
- Warm, moist environments.
- Organic material (sweat, skin, body oils).
- Rough, porous surfaces where they can attach and hide.
> If your flooring stays damp or never really dries, you are giving microbes ideal conditions to grow.
From a hygiene standpoint, the best flooring for gyms:
- Does not hold moisture.
- Allows fast drying after cleaning.
- Has a surface that can handle disinfectants without breaking down.
How cleaning products interact with gym flooring
You cannot separate flooring choice from cleaning choice. Some cleaners damage certain materials or leave residue that affects grip.
A few practical notes:
- Bleach (sodium hypochlorite) can discolor or degrade some rubber and foam, and fumes are not great for indoor use.
- Quaternary ammonium disinfectants (“quats”) are common in gyms and work well on many rubber and PVC floors if used at the correct dilution.
- Alcohol-based products can dry and crack some surface coatings over time.
- Strong solvents should never touch rubber or foam flooring.
You want a system where:
- The manufacturer states which cleaners are compatible.
- You have a written cleaning schedule.
- Staff know dilution ratios and contact times.
> If a cleaner leaves the floor sticky or slippery, it creates a different safety issue: falls.
Matching flooring to different gym zones
Most gyms are not one room with one use. You might have:
- Free weight areas.
- Strength machines.
- Functional training / HIIT space.
- Group exercise studio.
- Cardio area.
- Locker rooms and wet areas.
- Entry and reception.
Each needs different flooring specs for impact and hygiene.
Free weight and strength areas
This is where the big hits happen.
- Bars and plates dropping.
- Dumbbells slamming onto the floor.
- Benches and racks with concentrated loads.
Impact needs:
- High density rubber, 15 to 30 mm, to spread load and protect the subfloor.
- Good rebound control so weights do not bounce unpredictably.
- Firm feel underfoot for stable lifting posture.
Hygiene needs:
- Surface that can handle sweat, chalk, and frequent cleaning.
- Low to medium porosity; avoid surfaces that trap chalk dust deeply.
- Seams that do not open and trap dirt if tiles spread or shift.
> If you run barbell classes or CrossFit style training, consider defined “drop zones” with extra-thick tiles or dedicated platforms.
Cardio and machine areas
Treadmills, bikes, rowers, ellipticals.
Impact needs:
- Moderate shock absorption to cut vibration and noise.
- Enough firmness that machines do not rock.
- Protection for the subfloor, especially under heavy treadmills.
Hygiene needs:
- Good sweat resistance as people drip onto the floor around machines.
- Easy to mop under and around equipment feet.
- Surface that does not get slick from sweat spray.
Here, 6 to 10 mm high density rubber or sports vinyl often works well.
Functional training and HIIT zones
Lots of multidirectional movement:
- Burpees, lunges, jump squats.
- Kettlebell swings and drops.
- Battle ropes, plyo boxes, slam balls.
Impact needs:
- Enough cushioning to reduce joint stress on repeated jumps.
- Firm landing surface to keep ankles stable.
- Durable enough to accept occasional dropped kettlebells or dumbbells.
Hygiene needs:
- Frequent sweat on the floor from high intensity work.
- Body contact with floor during push-ups, planks, rolling.
- Easy cleaning between group sessions.
This area benefits from:
- 10 to 20 mm rubber, often in tiles for easy replacement.
- Non-porous or low-porosity surface, possibly sealed or factory vulcanized.
- Good visual zoning so people know where to drop and where not to drop weights.
Group exercise studios
Think classes: circuits, dance, yoga, Pilates, bodyweight strength.
Impact needs:
- Some spring to reduce repetitive joint loading.
- Good lateral grip for directional moves.
- Stable support for balance poses and slow control work.
Hygiene needs:
- Large amount of sweat over a wide area in busy classes.
- Often barefoot or minimal footwear use, so direct skin contact.
- Frequent need for fast cleaning between classes.
Here, many gyms go with:
- Sprung wood subfloor with sports vinyl top.
- Or premium sports vinyl on a shock-absorbing underlay.
> If you use foam tiles in studios, be ready for faster wear and more hygiene worries, especially with bare feet on porous foam.
Turf zones
Turf is popular for sled pushes, agility, and conditioning.
Impact needs:
- Enough underlay to soften landings from sprints and jumps.
- Firmness for sled pushes and direction changes.
Hygiene needs:
- Fibers that do not trap dirt, chalk, and hair too deeply.
- Backing that does not absorb sweat.
- Drainage plan if you use water-based cleaning frequently.
The biggest problem with turf is cleaning. Vacuuming is needed to remove debris. Disinfectant application needs to reach fibers and the backing.
For high sweat spaces, pick turf with:
- Non-absorbent backing (often polyurethane).
- Compatibility with spray-and-vac cleaning methods.
Locker rooms and wet areas
This is less about impact and more about slip resistance and hygiene.
You need:
- Non-slip, textured surfaces even when wet.
- Good drainage to avoid standing water.
- High resistance to mold and mildew.
- Regular disinfecting for fungi that cause athlete’s foot.
Common surfaces:
- Ceramic or porcelain tiles with grippy texture.
- Commercial vinyl with welded seams and coved skirting.
- Drainage tiles over a solid base in shower zones.
How to compare flooring products: a simple checklist
Flooring spec sheets can be confusing. You might see terms like “shock absorption,” “vertical deformation,” or “g-force attenuation.”
Here is a simple way to read them.
Impact metrics to watch
Look for:
- Shock absorption (%): How much of the impact energy the floor absorbs versus returns.
- Vertical deformation (mm): How much the floor compresses under load.
- Energy restitution (%): How much energy bounces back, which affects feel and bounce.
For gyms:
- Too low shock absorption: harsh landings, more stress on joints.
- Too high vertical deformation: unstable feel, especially under weights.
If the vendor provides data, compare across options in the same category. If they cannot provide any numbers, that is a red flag.
Hygiene and safety metrics
Ask about:
- Slip resistance: Tested in dry and wet conditions.
- Porosity or surface structure: Smooth vs textured, open vs closed surface.
- Chemical resistance: Which cleaners are approved.
- Fire rating: For code compliance.
> If you run a commercial facility, you are not just picking flooring. You are picking your legal risk profile.
Maintenance routines: the real determinant of hygiene
Even perfect flooring will turn nasty without basic routines.
You want maintenance that matches how the space is used and how many people train each day.
Daily tasks
- Dry cleaning: Sweep or vacuum to remove dust, chalk, hair, and debris.
- Spot cleaning: Wipe sweat puddles and spills as they occur.
- Damp mopping: Use an approved cleaner on all hard-use areas at least once per day, more in group studios.
A common pattern:
- Midday wipe of high use areas.
- Full clean after closing.
Weekly and monthly tasks
- Machine cleaning: Use auto scrubbers where compatible for larger rooms.
- Edge and corner detail: Hand clean edges, under benches, behind racks.
- Inspect seams and joins: Fix any gaps where dirt and moisture can collect.
- Check drainage areas: Make sure wet zones are not holding water.
> Cleaning frequency is not about “being picky.” It is about staying ahead of microbial growth cycles.
Air, humidity, and drying time
Hygiene is not just what you put on the floor. It is how fast the floor dries.
If your gym holds humidity at 60 to 70 percent and has poor air flow, floors will stay damp longer, which supports mold and bacteria.
You want:
- Reasonable humidity control, often in the 40 to 55 percent range.
- Fans or HVAC circulation that moves air across floor surfaces.
- Enough open time between mop and next heavy use for the floor to dry.
Common mistakes with gym flooring for impact and hygiene
Let us walk through what trips people up.
Going for the cheapest tiles you find online
Those interlocking foam or rubber tiles at very low cost look good on day one. Then:
- Edges curl.
- Tiles separate and move.
- Porous surfaces soak up sweat and smell.
- Under load, foam compresses permanently.
> If you are dropping weights over 20 kg, very cheap EVA tiles will not last, and you will pay twice: once for them, once for the replacement.
Using the same flooring everywhere
Different zones have different demands. One-size flooring creates weak points.
For example:
- Too soft under heavy racks: unsafe, unstable barbells.
- Too hard in HIIT zones: more joint stress for jump-heavy circuits.
- Too porous in group studios: hygiene concerns with barefoot classes.
A better approach:
- One base material for most of the gym (rubber rolls or tiles).
- Upgraded layers in high impact zones.
- Different surface in wet or barefoot rooms.
Not planning for cleaning from day one
Many gyms install beautiful flooring, then realize:
- The texture grips mops, making cleaning slow.
- Cleaning machines do not fit between tile ridges.
- Recommended cleaners are expensive or hard to find.
Before you buy, ask:
- How do other clients clean this product?
- Which chemicals are allowed?
- Can I test a sample with my planned cleaning method?
Special cases: home gyms vs commercial gyms
Your context changes how you trade off impact and hygiene.
Home gym flooring
At home, you usually have:
- Lower daily traffic.
- Smaller space.
- More concern about noise and neighbors.
- Less rigorous cleaning schedule.
For impact:
- 15 to 20 mm dense rubber tiles are often enough for most barbell work.
- Extra mats under deadlift zones can help protect subfloors.
For hygiene:
- Low porosity rubber is helpful because you probably will not deep clean every day.
- Keep a small caddy with a neutral pH cleaner and microfiber mop in the gym area so you actually use it.
Commercial gym flooring
You have:
- High traffic, long hours.
- Different user behaviors (some careful, some careless).
- Regulatory and insurance expectations.
- Brand and member experience at stake.
You need:
- Higher durability specs.
- Clear documented cleaning and inspection routines.
- Flooring choices that support consistent hygiene, not fight it.
> In a commercial setting, replacing failed flooring is more expensive than buying better flooring once.
Budgeting: cost vs long-term performance
Let us talk numbers, not just features.
Imagine two options for a 200 m² gym floor:
- Option A: cheap EVA or low grade rubber tiles at $15/m², lifespan 2 to 3 years before serious wear and smell issues.
- Option B: quality vulcanized rubber tiles at $35/m², lifespan 7 to 10 years with proper care.
Over 10 years:
- Option A: you likely replace at least twice, maybe three times, plus downtime. Material cost alone could hit $30 to $45/m², not counting disruption.
- Option B: one purchase, some spot replacements if needed.
From a hygiene standpoint, low grade flooring often becomes harder to clean over time, which can show up as:
- Higher staff time for scrubbing.
- More complaints or canceled memberships over smell or appearance.
If you run the math, quality flooring looks expensive upfront but often lowers cost per year and gives a better user experience.
Practical steps to choose flooring for impact absorption and hygiene
Let us pull this into a straightforward process.
Step 1: Map your zones and loads
Sketch your gym layout and mark:
- Where heavy drops will happen.
- Where people will jump most.
- Where people will be barefoot or floor-contact heavy.
- Where you have water or high moisture.
Give each zone a “load level”:
- Level 1: Light (stretching, yoga, low intensity).
- Level 2: Moderate (machines, cardio).
- Level 3: Heavy (free weights, HIIT, turf with sleds).
Step 2: Set minimum impact and hygiene requirements per zone
Example:
- Level 3: 15 to 30 mm dense rubber, low to medium porosity, high slip resistance, compatible with daily disinfecting.
- Level 2: 8 to 12 mm dense rubber or vinyl, good vibration damping, cleanable with auto scrubbers.
- Level 1: surface suitable for bare skin, easy disinfection, moderate cushioning.
Step 3: Talk to suppliers with specific questions
Ask each vendor:
- What thickness and density do you recommend for these activities?
- Do you have test data on shock absorption and vertical deformation?
- What cleaning products do you support on this floor?
- What is the porosity or surface structure like? Can I see a close-up sample?
- What is the warranty in a high traffic gym environment?
> When vendors can answer clearly and provide data, that is a positive signal. When they only talk about color options, be careful.
Step 4: Test real samples under real conditions
Before you commit to hundreds of square meters:
- Get physical samples.
- Drop weights on them.
- Stand, jump, and do some lateral moves.
- Pour a little diluted cleaner, wipe it, see how it dries and feels later.
- Leave a damp towel on it for a few hours, then smell and inspect.
This is where you learn if:
- The surface feels grippy, not sticky.
- The sound on impact is acceptable.
- The material seems easy or frustrating to clean.
Step 5: Design your cleaning and maintenance plan upfront
Before installation day, define:
- Who cleans which zones, how often.
- Which products and tools you will use.
- Where you store cleaning gear so staff will actually use it.
- How you track tasks (simple checklist works).
You can even ask flooring vendors for sample cleaning protocols they recommend for other clients.
One last practical tip
When you install new gym flooring, set a rule for the first week: every time someone drops a bar or a dumbbell in a new zone, watch what the floor does and how it sounds.
If the bounce looks aggressive, if the impact sounds too sharp, or if you see tiles shifting, adjust fast:
- Add drop pads or thicker tiles in those spots.
- Reinforce your “no dropping” rules in sensitive areas.
- Re-check installation and subfloor prep before more damage happens.